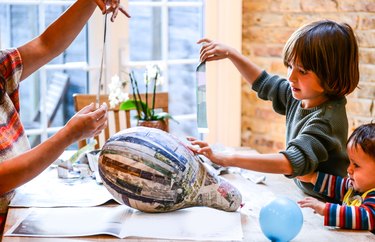
No matter how advanced their gadgets get, kids will always be entranced by simple crafts that let them get their hands dirty. Paper mâché is a classic craft for a reason: This art of making sculptures from paper hardened with glue is really easy to try at your own kitchen table. Best of all, you likely already have everything on hand that you'll need to make glue and water paper mâché.
Glue and Water Paper Mâché Recipe
Video of the Day
All paper mâché projects require two components: paper and a glue or paste mixture that hardens when dry. PVA glue, also known as basic white school glue, works wonderfully in a paper mâché project. It dries pretty quickly and is clear when dry.
Video of the Day
The PVA glue needs to be thinned enough to become runny. Start by pouring some glue into a foil pie pan or a shallow paper bowl. How much you'll need depends on the size of your project, but you might start with an amount equal to a few tablespoons. Add a few teaspoons of water and mix the two together with a paintbrush or wooden stirrer. Slowly add more water until the glue has the consistency of light cream. Generally, a two-to-one ratio of glue to water is ideal.
Glue and water paper mâché is just one method for making your own sculptures. It's also possible to make paper mâché paste from flour and water or from starch of some kind. Some crafters have perfected their own paper mâché recipes using glue, water and other ingredients like joint compound or flour.
Working With Paper Mâché
Paper mâché is best used in combination with a mold of some kind. Once they're wet, strips of paper won't hold a freeform shape that well. An inflated balloon makes the perfect mold for paper mâché. You can also make your own molds by creating shapes out of foil, cardboard and/or chicken wire.
Newspaper is typically the paper of choice for at-home paper mâché projects, but really any kind of paper will work. It may be fun to experiment with using white computer paper, construction paper and even paper towels.
To make your paper mâché project, tear the paper into strips that are no more than a few inches wide. Drag the strips through the glue and water mixture and run your fingers or a pair of chopsticks down the strip to remove excess glue. Press the strip onto your mold and repeat with more strips; the more layers you add, the stronger the finished piece will be. Let the sculpture dry completely after every layer or two.
Paper Mâché Tips
Once your glue and water mixture is made, you'll want to work fairly quickly to keep the glue from drying out. Work with small batches of glue and water at a time. Because inner layers have to be allowed to dry before more layers are added, a paper mâché project may ultimately take hours to complete. It's easy to make a new glue and water mix each time you set to work.
Paper mâché projects may be prone to mold if they're made with organic ingredients, such as flour. Water that gets trapped between layers of paper is the culprit. If you do add flour, it's critical to let every layer dry completely before adding the next.
Finally, note that some people have an allergic reaction to PVA glue. Because it's tough to make glue and water paper mâché without getting messy, it's advisable to wear gloves if you're prone to allergies or have sensitive skin.