Things You'll Need
PVC pipe cutter
PVC auto vent
PVC pipe cement
PVC pipe primer
PVC pipe
PVC sanitary tee

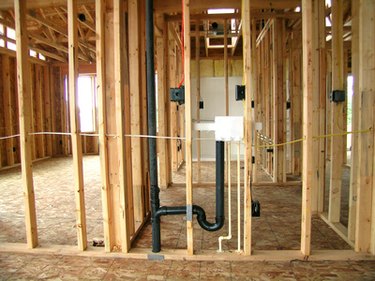
For standard wastewater drain pipes to function properly in a residential plumbing system, there must be adequate venting. In new construction, this is done by plumbing vent pipes off of all drain lines and running the vent pipes to the roof of the building. In certain situations, however, this isn't physically possible. If a sink drain is being installed in an island in the middle of a kitchen or if a new sink is being added in a renovation of an existing property, it may be necessary to plumb an auto vent in the waste line instead of the traditional vent pipe configuration. Auto vents are also commonly called cheater vents or Air Admittance Valves (AAVs).
Step 1
Locate the point where the PVC drain pipe transitions from horizontal to vertical piping after the P-trap. Cut the vertical and horizontal drain pipes so that a PVC sanitary tee can be attached to connect those two pipes.
Video of the Day
Step 2
Apply PVC primer to the inside edges of the sanitary tee fitting and to the outside of the edges of the vertical and horizontal PVC pipes. Allow PVC primer to dry (approximately one minute). Apply PVC cement to the inside edges of the sanitary tee fitting that make up the 90-degree joint portion of the sanitary tee and to the outside of the edges of the vertical and horizontal PVC pipes. Insert the ends of the elbow portion of the sanitary tee onto the horizontal and vertical pipe sections. Hold the connection firmly in place for 60 seconds while the cement dries. At this point, the remaining outlet on the sanitary tee should be pointed vertically up from the elbow joint.
Step 3
Cut a section of PVC pipe that will be attached to the vertical outlet of the sanitary tee. This pipe length will be determined by the physical constraints of the space. Do not cut a section that is so long that it will not allow the auto vent to be attached to the pipe. In most cases, this pipe section will be only 3 to 6 inches. Apply PVC primer to the inside edges of the outlet of the sanitary tee fitting and to the outside of the cut section of PVC pipe. Allow PVC primer to dry (approximately one minute). Apply PVC cement to the inside edges of the outlet of the sanitary tee fitting and to the outside of the edges of the pipe section. Insert the end of the pipe section into the outlet of the sanitary tee and hold firmly in place for 60 seconds while the cement dries.
Step 4
Apply PVC primer to the inside edges of the auto vent fitting and to the outside of the cut section of PVC pipe. Allow PVC primer to dry (approximately one minute). Apply PVC cement to the inside edges of the auto vent fitting and to the outside of the edges of the pipe section. Place the auto vent onto the pipe section and hold firmly in place for 60 seconds while the cement dries.
Step 5
Run water in the assembled drain and check for leaks. Due to the different characteristics of all plumbing systems, there may not be enough back pressure to activate the auto vent when just operating under normal drain conditions. To create more back pressure to test the auto vent, fill the sink or tub with water and then release the drain on the sink or tub. This should create sufficient back pressure to activate the auto vent.
Tip
Sanitary tees are also called "Tee-Wyes."
Warning
Not all local plumbing codes allow for the use of auto vents. Make sure to check local plumbing codes before installing auto vents.
Video of the Day