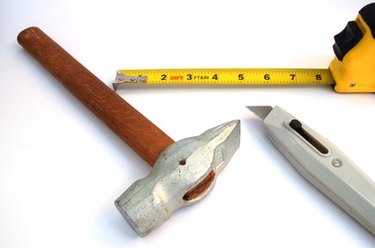
Things You'll Need
Thermoplastic Olefin (TPO) roofing
TPO bonding adhesive
Construction bonding adhesive
Drill
Various drill bits
Hammer or cat's paw
Measuring tape
Construction pencil
Circular saw
Ladder
2 x 4 studs
Plywood or OSB
Insulation
Long-handled paint roller
Disposable mask
Gloves
Scissors
Rags
Squeegee

Many travel trailers will develop leaks and sagging from excessive water damage to the roof. This can lead to the development of several other problems within the structure such as rotting floors, water damage inside walls and electrical shorts. Having the roof replaced by a professional can be expensive. Replacing the roof yourself is a fairly simple process that is well worth the time and money. With a few helpful tips and some basic tools, you can replace your travel trailer's damaged roof without busting your budget.
Removal
Step 1
Remove everything from the roof, including skylights, antennas and luggage racks.
Video of the Day
Step 2
Remove any rotten wood and insulation from the roof.
Step 3
Brace the roof for support from the inside with 2 x 4 studs if needed.
Repair
Step 1
Install new insulation to replace old insulation if necessary.
Step 2
Measure all areas where wood beams must be replaced.
Step 3
Measure and mark 2 x 4s for replacement. Cut to length.
Step 4
Apply a generous amount of adhesive to existing roof frame where new beams will be installed. Fit cut 2 x 4 studs into place. Press firmly for a few seconds to bond surfaces together tightly.
Step 5
Measure space where plywood is needed.
Step 6
Repeat steps 3- 4 to install new plywood.
Replacement
Step 1
Clean roof surface thoroughly with a damp rag, removing all dirt and debris. Dry completely.
Step 2
Measure roof width and length. Cut TPO to fit the entire roof, adding approximately 2 inches on each side. Roll TPO so you can unroll it lengthwise across the roof in sections.
Step 3
Apply a thin coat of roof adhesive evenly with paint roller to a 4 by 4 foot section of roof, beginning at one end. Let dry until just slightly tacky to the touch.
Step 4
Leaving 2 inches of TPO to hang over each edge, place TPO at the edge of roof and unroll evenly to cover the glued section.
Step 5
Run squeegee firmly over newly applied TPO surface to remove bubbles and wrinkles.
Step 6
Repeat steps 3-5 until entire roof is covered.
Step 7
Cut a slit in each corner of TPO membrane.
Step 8
Apply adhesive to the top 2 inches of the top of one side of the travel trailer. Press overhanging edge of TPO to the adhesive.
Step 9
Repeat step 8 for all sides of trailer.
Tip
Liquid Nails is one of the best construction adhesives available.
Warning
Measure twice, cut once. You will save a lot of time and money if you follow this simple adage.
Video of the Day