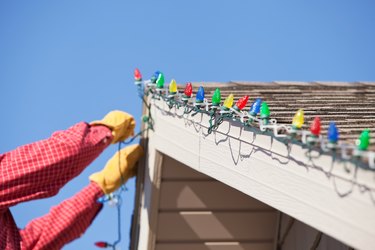
Every family evolves its own set of Christmas traditions, but one is nearly universal: grappling with a set of balky lights. Identifying and replacing bad bulbs is a relatively straightforward process, but finding out why your Christmas lights keep blowing a fuse can be a bit more complicated.
Fuse Location in Christmas Lights
Video of the Day
If you've tested the lights in a string and they're all fine but the string still won't light up, that usually means you've blown the fuse. Before you can replace it, you'll first need to find it.
Video of the Day
The fuse is typically located in the electrical plug at the beginning of your string of lights. If you look closely at the plug, you'll usually find a sliding door located on one side of it with an arrow showing you which direction to slide the cover to open it. Underneath, you'll find one or two small fuses.
Some plugs use less common arrangements. You might find more than one sliding door, each with a fuse underneath. Some may be held on with screws rather than sliding open. You may even find plugs where the opening is between the tines rather than on the side. If you can read the manufacturer's name and model number on the string, it's sometimes a time saver to check its website first so you'll know where to look.
Christmas Lights Keep Blowing a Fuse
The reason your lights blow is usually because you've chained too many of them together. Each string of lights you connect increases the load on the circuit, and eventually, you'll exceed the fuse's rating.
With low-power LED lights, you might be able to connect as many as eight to 10 strings depending on the brand and model. With conventional incandescent bulbs, you might be limited to as few as two. That information should be printed on a tag on the lights themselves or molded into the plastic. If not, look it up on the manufacturer's website.
If the fuse is blowing even when you're within the recommended number of lights, the problem is usually physical damage. Check the string carefully for any signs of fraying (especially where it connects to the plug) or places where the insulation has been damaged. That can happen easily when lights are caught in a door or under furniture or when they're mounted outdoors with a staple gun. In some cases, you may be able to fix the damage by replacing a plug or wrapping the damaged wire with electrical tape, but usually, it's best to replace the whole string.
Replacing the Fuse
To replace a fuse, pry it from the plug with the tip of a small screwdriver or a similar tool. Double-check first that it's blown by either holding it to the light and checking that the wire is severed (or that it literally looks burnt) or by testing it with a multimeter. The fuse will have a rating inscribed on the metal cap at one end, usually three to five amps. Replace it with a fuse of the same rating.
Some strings come with spare fuses taped to the lights or the plug, which will save you a trip to the hardware store. In some cases, the second fuse inside the plug will be a spare. Look to see if the plug has metal contacts for both fuses. If not, the one with metal contacts is the working fuse and the other is a spare.
Lights Blowing a Home Fuse
If your lights are blowing a fuse or breaker in your home's panel rather than the one on the string of lights itself, that's a related but different problem. It means you're putting more load on the circuit than it can comfortably handle (typically 1,400 watts and up).
To troubleshoot, take a plug-in lamp and go from outlet to outlet while the fuse or breaker is still blown. Plug it into every nearby outlet, noting where the light comes on and where it doesn't until you've identified all of the outlets on that circuit. After you replace the fuse or reset the breaker, move some of your lights (or other household appliances and electronics) to outlets on a different breaker to lessen the load on that first circuit.