Things You'll Need
Tape measure
Wall frame sill plate
Pencil
Carpenter's square
Power drill
Wood-boring bit
Anchor bolt washers and nuts
Wrench
Hammer drill
Masonry bit
Painter's tape
Air compressor or vacuum
Anchor bolt epoxy
Anchor bolts
Torpedo level

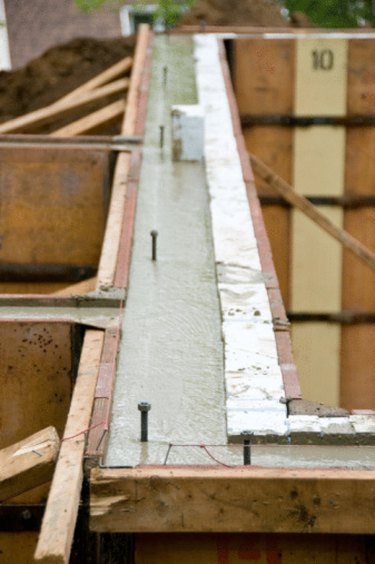
Builders call the process of securing wall frames to a foundation "anchoring." While load-bearing walls must anchor to the foundation with heavy-duty bolts, walls that don't bear a structural load, called "partition" walls, often attach to a foundation with light-duty concrete screws and powder-actuated nails. In addition to the various types of anchors, there are two general methods of anchoring: cast-in-place anchors and retrofit anchors. Whereas builders insert cast-in-place anchors into wet concrete, retrofit anchors install in cured concrete. Learn the common methods of securing home wall frames to a foundation, and consult your blueprints and local building codes to choose the right one for your project.
Attaching Wall Frames to Cast-in-place Anchors
Step 1
Stretch a tape measure across the foundation along the path of the anchor bolts. Measure the distance between the anchor bolts and the distance from the anchor bolts to the foundation's edge.
Video of the Day
Step 2
Stretch the tape measure across the length of the wall frame's sill plate. Mark the location of each bolt along the length of the sill plate. Butt a carpenter's square against the edge of the sill plate, position the square over a bolt mark and use the square's edge to mark the location of the bolt relative to the plate's width; the intersection of the two marks is where you must drill an access hole for an anchor bolt. Lay out the hole positions of the remaining bolts.
Step 3
Attach a wood-boring bit to a power drill. Drill entirely through each of the bolt holes marked on the sill plate. Lay out identical bolt holes on the wall frame's bottom plate and drill out the holes, using the power drill.
Step 4
Place the sill plate over the cast-in-place anchor bolts. Hoist the wall frame over the bolts and set the wall frame's bottom plate on top of the sill plate. Align the edges and ends of the bottom plate with the edges and ends of the sill plate. Place a washer and nut on each anchor bolt. Tighten the nuts with a wrench to secure the wall frame to the foundation.
Retrofit With Epoxy and Anchors
Step 1
Mark the location of each anchor bolt on the cured concrete foundation, using a pencil. Space and position the bolts according to your blueprints or building plans. Attach a masonry drill bit to a hammer drill.
Step 2
Place a tape measure at the side of the bit and wrap a piece of painter's tape around the bit's shaft at the measurement that represents the overall depth of your bolt hole; the piece of tape serves as a visual cue that tells you when to stop drilling. Select the bolt depth according to your building plans.
Step 3
Press the masonry bit's tip against a bolt hole mark, activate the drill and drill until the painter's tape reaches the foundation's surface. Blow concrete dust from the hole with an air compressor, or suck the dust with a vacuum. Drill the remaining bolt holes.
Step 4
Fill a bolt hole with anchor epoxy until the hole is nearly full. Insert an anchor bolt into the epoxy and wipe any excess epoxy from the hole's rim. Place a torpedo level at the side of the bolt and align the bolt to a plumb position; the term "plumb" refers to a perfectly vertical position. Fill the remaining bolt holes with epoxy, insert the bolts and plumb the bolts. Allow the epoxy to cure according to the manufacturer's guidelines.
Step 5
Lay out the position of the anchor bolts on the wall frame's sill plate. Use a power drill and wood-boring bit to drill anchor bolt holes through the sill plate. Lay out and drill anchor bolt holes through the wall frame's bottom plate. Lay the sill plate over the bolts, place the wall frame over the sill plate and install washers and nuts to secure the wall frame to the foundation.
Warning
Immediately clean epoxy from the foundation's surface; cured epoxy is difficult to remove, and large clumps will cause your sill plate to sit unevenly.
Video of the Day