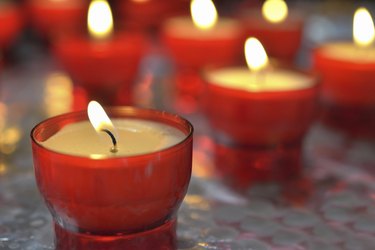
Making your own candles doesn't necessarily require special melting equipment. Instead, melt the wax in a Crock Pot you've designated for crafting; it's a safe way to create candles of all sorts, from votives to jar candles to tiny tea lights. Never leave the Crock Pot unattended when you're working with wax.
Candle-Making Supplies
Video of the Day
Along with the Crock Pot and candle wax, you'll need pre-waxed wicks and, ideally, metal wick bases that make the wicks stand upright. Purchase the wicks already in the bases for simplicity, making sure the wicks are taller than the candles you plan to make. Otherwise, you can make your own by purchasing the wicks and bases separately, inserting the end of each wick through a base as needed. Wicks can be cut to size; keep the wick 1/2 to 3/4 inch taller than you think the finished candle will be.
Video of the Day
Wooden spoons come in handy to stir the wax, and you'll also need a vessel that pours easily, such as a glass measuring cup, for handling molten wax. You can use essential oils and candle dyes to scent or color the candles, but these are entirely optional. Do not reuse any tools that come into contact with the wax for food purposes.
Bricolage Candles
Make your own new candles from leftover candle odds and ends, hardened wax drippings and even scented wax tarts. Place candle bits of similar color or scent into a container, such as a large glass measuring cup designated for craft use only. Set the glass inside the Crock Pot, and then add 1 or 2 inches of water to the bottom of the pot. The water is optional, but adds heat to the sides of the glass for speedier wax melting. Turn the Crock Pot to medium or a medium-high setting, and place the lid on the pot, if it still fits. Check the progress every 15 minutes or so, stirring the wax with a wooden spoon or a skewer.
While you wait for the wax to melt, place the wicks -- already in their bases -- inside of your chosen molds, such as empty small beverage cartons cut several inches tall, or empty yogurt cups. Use a mold similar in size to the amount of molten wax. The wick should extend past the top of the mold. When the wax has melted completely, pour it into the mold, allowing the wax to harden completely. It may take several hours or longer. Once the wax is hard, pop the candle out of the mold, or tear a paper-based mold off the new candle. Use the same techniques to make floating candles, but use floating candle molds or tart molds in place of discardable materials. Place the hardened candles in the freezer for 30 minutes or so to remove them from their molds easily.
Hand-Dipped Candles
A tall can, such as a metal coffee can or old metal coffee pot, allows you enough room to create hand-dipped candles. Tie a 15-inch length of candle wick around a one-inch thick dowel or branch from outdoors. If the metal pot is wide enough to dip two candles at once, tie two wicks to the same branch, several inches apart. Fill the metal vessels 3/4 full with paraffin wax, or wax designed for pillar and taper candles, as it stays firmer than other wax varieties.
Place the metal vessel in the Crock Pot; add an inch of water around the metal -- not in the wax area. Then turn the Crock Pot up to medium-high heat, stirring every 10 or 15 minutes. Once the wax melts completely, turn off the Crock Pot. Hold the stick or dowel horizontally, and dip the wick or wicks into the molten wax several times, allowing the wax to cool for 30 seconds or so between dips. At first the wick may float a bit, but after a while, the weight of new wax will hold the wick down. After the wick sinks on its own, allow it to cool for several minutes between dips, otherwise the wax may melt off. With each dip, the wax buildup gets thicker and thicker, eventually resembling a candle. Once the candle is thick enough to be a taper candle, stop dipping it. You may need to shave the bottom of the candle with a paring knife to make it fit into a candlestick.
Jars, Pots and Tealights
To make candles in jars, glass votive holders, metal pots or even empty tea light tins, place wax shavings in the desired vessels, and then set them in the bottom of a cool Crock Pot. Heat the Crock Pot up to a medium temperature setting, stirring the wax with skewers once in a while until it melts completely. Center precut wicks -- complete on wick bases -- into the liquid wax, being careful not to touch the hot wax. Turn the Crock Pot off and allow the candles to cool completely. Soft waxes such as soy wax or wax designed for jar candles are best for this type of candle. To scent or dye large candles, add a few drops of essential oil or candle dye to each candle before adding the wicks. Stir the wax to blend the ingredients. Do not add scent or color to tea lights using this method, as it may be difficult to measure out such small amounts of additives in safe proportions for tiny candles.