Things You'll Need
Dried art work
Ventilated work space
Tarp or newspaper
Mask
Rubber gloves
Measuring cups
Epoxy resin (with hardener)
Stir stick or paint stick
Tooth pick or barbecue lighter

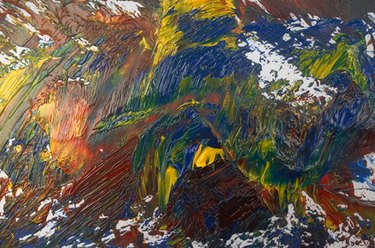
Using an epoxy resin with oil paint can be a rewarding experience. It will leave a hard, clear, glossy finish that will allow your artwork to stand out. There are many techniques that can be used with epoxy resin, but the one that is used most often is creating a thick finish over the entire piece of artwork.
Step 1
Choose a location. Epoxy is toxic and has strong fumes, so make sure you choose a well-ventilated location, preferably outside. If this is not possible, a garage or shed will work well.
Video of the Day
Step 2
Prop up your dried artwork on a level surface. Stretched canvas can be worked with alone, however other mediums should be mounted first. Be sure to cover your work space with a tarp or newspaper, as dried epoxy resin is nearly impossible to remove from tables and floors.
Step 3
Put on your rubber gloves and mask to protect yourself from the toxic chemicals you will be using. If working inside, open any windows in your workspace, and turn on fans to help increase ventilation.
Step 4
Measure your epoxy and hardener according to the directions on the package. Make sure to measure accurately or you will get unpredictable results and your epoxy resin may not harden. Make sure to scrape the edges of your measuring cups for increased accuracy.
Step 5
Take your stir stick and mix the two components well. Refer to the package directions, but two minutes is a good guideline. Once the mixture is combined, pour it over the art work. Take your stir stick or any pliable metal and spread the epoxy mixture evenly.
Step 6
Immediately remove any bubbles that appear. This can be done either by popping them with a toothpick or by holding a barbecue lighter close to the epoxy. Be sure not to actually touch the flame to the epoxy, as it is flammable. Check on your epoxy finish at 15 minute intervals for the first hour to make sure no new bubbles appear.
Step 7
Allow the epoxy to dry undisturbed for several days. It will begin to harden immediately. Another coat (if desired for increased thickness) can be added once the resin is dry to the touch, usually within 24 to 72 hours, depending on the size of the artwork. The epoxy will continue to harden and will completely cure within a week.
Tip
Use an old paintbrush to fix the sides of the painting once you have finished.
When using epoxy resin with oil paint, sometimes a thin greasy layer will form on top of the epoxy resin if the oil paint was not completely dried before application; it can be removed from cured resin by using a wet cloth and mild soap.
Once you have mastered this technique, try different effects by working with wet oil paint or only applying resin to certain parts of a painting.
Warning
Epoxy resin is toxic. Make sure not to get it on your skin or breathe the fumes.
Make sure your work area is dust-free, as you do not want any dust sticking to the epoxy.
Video of the Day