Things You'll Need
Measuring tape
Notepad
Fabric for outer corset
Fabric for corset liner
Straight pins
Fabric crayon
Scissors
Threaded sewing machine
Eyelets
Eyelet setter
Hammer
10 feet of ribbon

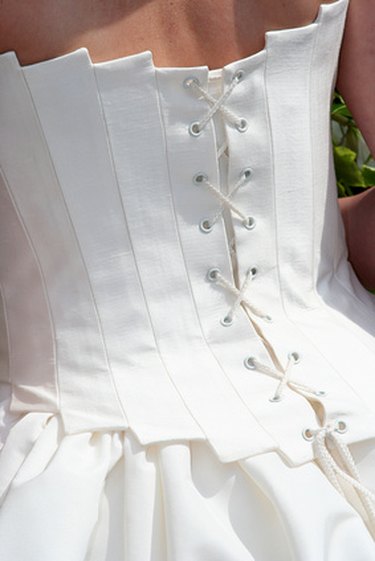
Corsets are a clothing piece often worn to elegant and dressy events. They efficiently bring out a woman's natural assets and enhance her body due to their tightly fitted sides and lace-up bodice. Although corsets were originally used to cinch in the waist and lift the bust, they are now more commonly used as an every day item of clothing one can wear to events or as lingerie. There are various corsets sold commercially; however, a less costly alternative is to make your own. This allows for a more personalized approach by adding embellishments on various fabrics.
Step 1
Measure the size of your bust, around your ribcage, around your hips and from your waist to under your arms with a measuring tape.
Video of the Day
Step 2
Mark the measurements acquired on a notepad or scrap piece of paper with a pencil.
Step 3
Use the Custom Corset Pattern Generator to generate the pattern for the corset.
Step 4
Follow the instructions that have been generated to trace the edges of the pattern on a piece of paper. Glue multiple pieces of paper together to form the pattern.
Step 5
Cut the pattern along the outline from the piece of paper.
Step 6
Place the fabric on a flat surface.
Step 7
Attach the pattern to the fabric using straight pins. Trace around the pattern with a fabric crayon. You will sew along the crayon lines.
Step 8
Cut the fabric an inch outside the pattern. The extra inch will be used for seam allowance.
Step 9
Repeat the procedures in Steps 8 and 9 to cut an additional panel from the fabric and two panels from the liner.
Step 10
Place one of the outer fabric panels on a flat surface. Place the liner piece on top of the outer panel with the right sides aligned together. Sew a seam along the lines traced with the fabric crayon. Leave a gap at one end of the panels.
Step 11
Turn the panel inside out so the seam is in the right place.
Step 12
Fold in the gap seam and sew the panel closed. Sew a top seam along the entire panel with your sewing machine. Repeat steps 11 to 13 for the remaining panels.
Step 13
Place the two pieces on a flat surface. Use a ruler to make a mark one inch from the front seam of the corset on each panel. Mark with the crayon at each inch along the ruler, one inch in from the front seam.
Step 14
Cut small holes for every mark you made slightly smaller than the size of the eyelets.
Step 15
Insert an eyelet into the first hole from the inner side of the panels. Make sure the rounded edge of the eyelet is visible on the front of the panels. Insert the eyelet setter from the outer edge of the panel. Use a hammer to secure the eyelets. Repeat the procedure for each hole in the panels.
Step 16
Place the panels on a flat surface side by side in the appropriate position. Sew a seam along the back side to connect the two panels.
Step 17
Insert a piece of ribbon into each of the eyelets to lace up the corset.
Tip
Cotton, velvet or polyester fabrics are often less challenging than thicker fabrics.
Sew additional decorations to the corset such as rhinestones, chains, sequins or metal studs for a sleek, finished look.
Video of the Day