Things You'll Need
Wood stripper
Paintbrushes
Paint scraper
Coarse steel wool
120-grit sandpaper
Palm sander
Wood conditioner
White stain or wood primer
Rags
Clear finish
Trisodium phosphate
Rubber gloves
220-grit sandpaper
Whitewashing wax
Cheesecloth
Ultra-fine steel wool
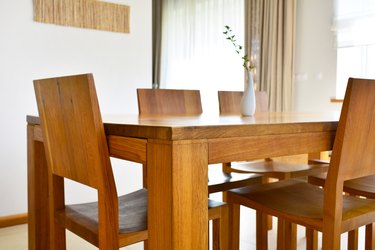
In the days before modern protective finishes were available, people preserved wood by whitewashing with lime. It protected the wood from rot and moisture while giving it a characteristic washed-out appearance. In lieu of authentic whitewash, modern finishers use stain, whitewashing wax or even white primer to get the same effect. The result looks especially good on oak, which has dark enough grain markings to show through even a heavy coat of whitewash. One of the advantages of this technique is that stripping and sanding are optional -- you can whitewash oak over an existing finish, and it will still look good.
Remove Finish and Whitewash Oak
Step 1: Strip the Finish
Strip the existing finish with wood stripper if you want the whitewash to penetrate the grain. This step is optional -- it's recommended if you want the whitewash to appear almost opaque and show only a small amount of wood grain. Apply the stripper with a paintbrush, and then scrape off the finish with a paint scraper and coarse steel wool. Wash the wood with water and let it dry.
Video of the Day
Step 2: Sand the Wood
Sand the wood with 120-grit sandpaper to remove the stripper residue and to open the grain. Use a palm sander or sand by hand, going with the grain.
Step 3: Condition the Wood
Apply a single coat of wood conditioner with a paintbrush, before you put any whitewash stain on the oak. This thin liquid contains paraffin, which seals the grain and prevents the stain from blotching. Let the conditioner dry for one to two hours.
Step 4: Apply the Whitewash
Brush on white stain or wood primer, completely covering a section of the piece you're whitewashing, and then wipe some off with a rag. The amount you remove determines the opacity of the final finish -- for an authentic whitewashed appearance, leave more stain or primer around the edges to make them appear whiter. When you whitewash furniture, always wipe with the grain of the wood -- never across it.
Step 5: Seal the Finish
Let the stain dry overnight. Then apply one or two clear coats of protective varnish or lacquer.
Whitewash Finished Oak
Step 1: Clean the Wood's Surface
Clean the piece you're about to whitewash with a mixture of 1/2 cup trisodium phosphate per gallon of water. This strong cleaner removes all surface grime and dulls the finish to prepare it for the stain. Wear rubber gloves when using TSP.
Step 2: Sand For Improved Adherence
Scuff the finish with 220-grit sandpaper to completely degloss it.
Step 3: Apply the Whitewash
Whitewash with stain, primer or whitewashing wax. If you use stain or primer, brush it on with a paintbrush and wipe it off with a rag while it's still wet. To whitewash with wax, apply the wax with cheesecloth, rubbing it in circular strokes. Remove the excess with ultra-fine steel wool.
Step 4: Seal the Surface
Protect the whitewash with one or two coats of clear finish. It's best to use the same type of finish that was already on the wood, but if you don't know what it was, use a water-based polyurethane or acrylic product.
Tip
To get a more subtle whitewash, thin the paint or primer before applying it. It's a good idea to test the stain or primer on a piece of scrap wood before using it on your furniture.
If you aren't satisfied with the whitewash, you can always remove it with mineral spirits, as long as you do it before applying the protective clear coat.
You can distress oak by hitting it with a chain or hammer or scraping it with a nail to make it look old, and the effect looks more authentic if you do this before applying the whitewash.
Video of the Day