Things You'll Need
Filler putty or sandpaper
Rag or sponges
Mineral spirits
Lint-free towel
Thin-set
Latex additive
Stirring stick or electric stirrer
Notched trowel
Rubber mallet
Level
Spacers
Tile cutter or saw
Safety glasses
Grout
Grout float

Tile installations take to almost any substrate or backerboard, and their natural resistance to staining and moisture invasion makes them ideal for floors and walls in many homes. One option for walling that will support tile is called greenboard. Greenboard is a type of sheetrock or drywall that is moisture-resistant, and can be used in areas with a little extra moisture, such as kitchens. Once your greenboard is installed, move on to installing the tile to finish up your surface.
Step 1
Inspect the greenboard surface for any damage and to ensure that the surface sits perfectly level. If you find damaged areas, such as cracks or dips that are larger than 1/8-inch wide, fill in the area with filler putty to prevent further cracking, which could damage the tile. If you find high areas, lightly sand them down with fine-grit sandpaper.
Video of the Day
Step 2
Wipe down the greenboard with a rag or sponge dampened in mineral spirits. This solvent cleaner will wipe away dirt, grease, oil and wax from the surface. Wipe the area dry with a lint-free towel, or allow it to air-dry before continuing.
Step 3
Mix thin-set tile mortar with a latex additive per the specific product instructions. The latex additive will make the mortar stickier for the base coat.
Step 4
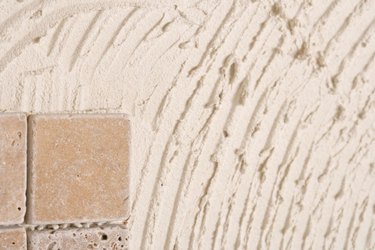
Spread a ¼-inch layer of the tile mortar over the entire greenboard piece. Use the flat edge of a notched trowel to create a flat coat. This will provide an extra bonding layer between the tile and the greenboard, which is important to avoid gaps or bumps in the tile. Start installing the tile while this coat is still wet.
Step 5
Mix up a fresh batch of thin-set, using water as directed instead of the latex additive. Using water will create a thicker consistency to bond to the tile. Mix until you have removed all clumps and the mortar has the consistency of thick peanut butter.
Step 6
Trowel a clump of thin-set onto the center of your first tile. Holding the trowel at a 45-degree angle, use the notched edge to spread the thin-set evenly across the back of the tile, creating small ridges in the thin-set. Make sure you have a uniform coating; scrape off any excess.
Step 7
Set the first tile in place at your desired starting position. Press firmly with both hands, applying even pressure over the whole surface. Use a rubber mallet to gently tap the tile in place. The thin-set on the back of the tile will bond with the mortar already placed on the greenboard to create a firm hold. Scrape away any excess that oozes from the edges of the tile, using the trowel.
Step 8
Continue to add tile to the greenboard, using a level and the mallet to make sure the area sits completely flat. Add spacers between all tiles to maintain a steady grout joint of 1/8 to ¼ inch, depending on your manufacturer's specifications.
Step 9
Cut tiles as necessary, using a tile cutter, sharp utility knife or, for natural stone tiles, a diamond-blade wet tile saw. Make sure you accurately measure before cutting. Wear safety glasses when cutting tile to protect yourself from any shrapnel, and wear a dust mask as well if you're using a saw, since the saw will produce a lot of stone dust.
Step 10
Set all tiles in place on the greenboard. Allow the thin-set to dry overnight before continuing.
Step 11
Mix grout and water together per the product instructions. Use unsanded grout for 1/8-inch joints and sanded grout for any joints larger than that. The grout will fill in the gaps between the tiles and create a more water-resistant surface that will protect the greenboard and make the installation last longer.
Step 12
Spread grout over the surface with a rubber grout float held at a 45-degree angle to force the grout into the joints. When you have covered the whole area, wipe grout off the tiles with a damp sponge and fill in any gaps in the joints. Allow the grout to cure overnight before exposing the area to moisture.
Tip
For floors, create a guideline on the greenboard that shows you the exact center of the room, and then work outward from the center. That way the center of the room, which generally attracts the most attention, features full tiles. This doesn't matter as much on a wall, where the goal is uniformity in lines.
Warning
Never use greenboard in high-moisture areas such as bathrooms. The board is water-resistant but not waterproof, and will not guard against moisture invasion and mold growth.
Video of the Day