Things You'll Need
Hydraulic lift or drive-on lifts
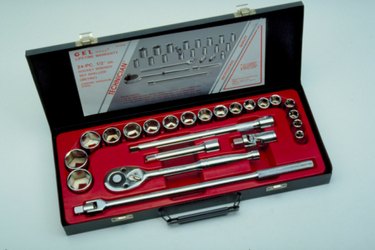
Socket wrench
Full set of sockets
Flathead screwdriver
Phillips screwdriver
Tire Iron
Sprocket puller
Sprocket Installer
Timing chain
Oil or WD-40

The timing chain was used heavily throughout the 1970s and 1980s but was scaled back for the easier to replace timing belts in the 1990s. However, being made of steel and not rubber, the timing chain is more durable so there will be less of a need for replacement. One of the few cars in the 1990s that had a timing chain was the Pontiac Sunfire. It was made to replace the Sunbird and was produced until 2005 when it was discontinued.
Removing the Cover of the Timing Chain Housing
Step 1
Drive the Sunfire onto a a pair of drive on lifts to raise your 1996 Pontiac Sunfire securely off the ground. Make sure you use the emergency brake to keep the car from rolling off the lifts.
Step 2
Loosen and remove the negative battery wire using your hands. Using a socket wrench, remove the oil pan. The serpentine drive belt is removed using the flathead screwdriver. Remove the power steering pump from its housing with the Phillips screwdriver, but do not disengage the attached hoses. Remove the generator from its housing with the Phillips screwdriver, but again do not disengage the wires attached to it. Remove the drive belt tensioner using the socket wrench.
Step 3
Using the tire iron, remove the the drivers side front wheel. Take off the engine splash shield with the socket wrench.
Step 4
Remove the bolt from the center of the crankshaft pulley and also remove the three crankshaft pulley bolts with the socket wrench. Remove the crankshaft pulley hub with the socket wrench then remove the bolts and take off the front cover with your hands.
Removing the Timing Chain
Step 1
Line up the timing marks from the camshaft and crankshaft sprockets with the tabs from the chain tensioner.
Step 2
Remove the timing chain tensioner upper bolt and loosen but do not remove the timing chain Torx bolt with the socket wrench.
Step 3
Remove the camshaft bolt with the socket wrench. Remove the camshaft sprocket with the sprocket puller as well as the timing chain with your hands.
Step 4
Using the sprocket puller remove the crankshaft sprocket
Replacing the Timing Chain
Step 1
Replace crankshaft sprocket using sprocket installer. Make sure that the sprocket is secure against the crankshaft. Compress the chain tensioner spring and place a cotter pin or a nail in the hole of the tensioner
Step 2
Install the camshaft sprocket and the timing chain making sure to align the sprocket marks with chain tensioner tabs. Align the camshaft sprocket hole with the cam shaft dowel pin. Install the camshaft bolt and tighten to specification using the socket wrench.
Step 3
Replace and tighten the chain tensioner upper bolt and tighten down the Torx bolt to specifications. Remove the nail or cotter pin from the chain tensioner then lubricate the timing chain
Replacing the Front Cover
Step 1
Place the cover back on and tighten the bolts down to specification. Replace the crankshaft pulley as well as the four bolts that hold it in place.
Step 2
Replace the engine splash shield as well as the driver's side front tire.
Step 3
Replace the drive belt tensioner as well as the belt attached and make sure it is at the correct tension. The correct tension is when the belt goes over all the pulleys and there is no slack in the belt. Put the generator in its housing and put the power steering pump in its housing as well. Put the oil pan and serpentine belt back in their respective places. Make sure that the serpentine belt is at the correct tension. Put the negative battery wire back on the negative battery terminal and slowly lower your car back to the ground.