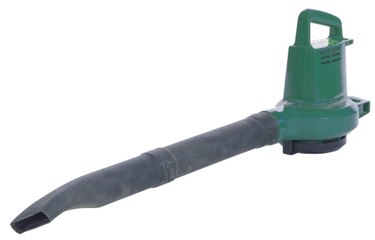
Weed Eater leaf blowers are useful for clearing large amounts of leaves from your lawn during the fall without requiring the effort of raking them. People count on their leaf blowers to perform properly each season and keep their lawns looking good; however, it's not unusual for technical problems to occur during the course of a leaf blower power tool's lifetime. Troubleshooting your Weed Eater potentially saves you money if it means you don't have to return the blower for repair.
Electric Weed Eater
Video of the Day
Step 1
Plug the blower into a wall electricity outlet. Move the power switch on the back of the handle to the "On" position. For safety reasons, the blower won't start as soon as it is plugged in, so you'd have to turn the switch off and then on if the switch was in the "On" position when you plugged it in. Always make sure the blower nozzle is pointing away from your body and other people when you flip the power switch. It's always good to check the simple things first.
Video of the Day
Step 2
Ensure that the appliance is plugged in to a working electrical outlet. A fuse or breaker may have tripped in your home, preventing the outlet from supplying electricity. Plug another electrical item such as a lamp into the same outlet you're trying to use for the leaf blower as a test. If the lamp worked previously but doesn't work in the blower outlet, the problem likely lies in the outlet, not the blower. Replace any blown fuses or reset tripped breakers and try again. Always make sure the outlet is switched on (if necessary) before starting the blower; some outdoor electricity outlets have reset buttons to push to switch power on.
Step 3
Use a 120-volt alternating-current extension cord rated for outdoor use. The cord must be rated properly for use with a Weed Eater leaf blower. A 25-foot extension cord must be at least 18 American wire gauge (AWG), a 50-foot cord must be at least 16 AWG and a 100-foot extension cord must be a minimum of 14 AWG. Speak to a hardware store salesperson about finding the right extension cord.
Step 4
Wipe any debris away from the air intake grille beneath the handle. Dust and leaves are easily sucked against the grille, causing the appliance to overheat. Press the tube release button near where the blower tube meets the motor. Disconnect the blower tube and check for blockages.
Gas Weed Eater
Step 1
Make sure the blower has enough fuel remaining in its tank. You might have trouble starting the blower if the fuel tank is empty or very low. Refill the tank, turn the choke lever to the positioned marked with a rabbit icon, and press the primer bulb six times. Pull the starter cable until the engine starts. Move the choke lever to the "CHOKE OFF" position once the engine is warm.
Step 2
Let the engine cool, then remove the screw over the air filter cover on the side of the motor. Carefully remove the air filter and wash it with clean soapy water, removing any dirt or debris. Let it dry. Add a drop of oil and squeeze the filter to distribute the oil throughout the filter. Return the filter to the blower and screw the filter cover back on. Try the blower again. Dirt and debris can restrict the airflow into the engine -- clean the filter again after five hours of use.
Step 3
Let the engine cool and twist off the rubber boot covering the spark plug. Unscrew the existing plug and replace it with a new Champion RCJ-7Y spark plug. Screw the new plug in place using a 3/4-inch socket wrench and replace the rubber boot. You should replace the spark plug every year. The motor won't start if the spark plug isn't working.