Things You'll Need
Model base of plastic, foam or wood
Balsa wood strip
Craft glue
Enamel paint
Two-part clear casting resin
Clear plastic cups
Stir sticks
Modeling ground texture
Modeling ground cover (optional)

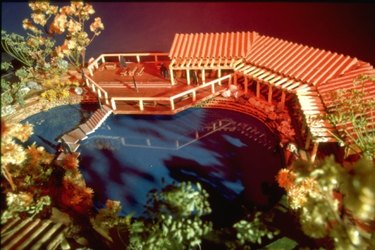
Building miniature models requires creating realistic scenes. This can mean anything from people, vehicles, buildings or even surrounding scenery. By creating realistic scenery, you add to the realism of the model itself. A difficult scenery element to replicate is water. With its natural movements and semi-transparency, natural bodies of water are a challenge to simulate with any level of realism. Resin helps overcome this difficulty because it begins as an actual liquid and can be shaped as it cures. With your help, the resin recreates a natural ebb and flow, shorelines, or the rough waters of a stormy sea.
Step 1
Create a base for the water on your chosen material: plastic, foam or wood. Dam off the water area with a piece of balsa wood, placed at the height you wish to hold the depth of your water. Glue the balsa to your model base with wood glue, making certain there are no holes in the joint between the balsa and the base through which the poured resin might escape. Let the glue dry.
Video of the Day
Step 2
Paint or texture the base with whatever materials or colors your scene requires. For example, model sand, dirt or rocks, or dark blue paint for mid-oceanic water. Glue the texture securely to the base and allow the texture or paint to dry completely before continuing. If you used a textured material, tap off any extra before continuing. Any loose bits that remain will float in the poured resin, ruining the water effect.
Step 3
Pour the resin catalyst into a clear plastic cup. Dye the resin by adding enamel paint to the liquid and mixing it throughout with a stir stick to get the color of water you want. Use a reference photo for the type of water you want to recreate to get the right color. Create the look of deep water by using multiple layers of resin, representing the changing water depths with layers of different-colored resins. For example, use a darker tint for the lower layers and deeper water, and mix a lighter tint of resin as you rise toward the water's surface.
Step 4
Mix the second part of the resin, the hardener, into the tinted catalyst in the ratio given by the resin manufacturer.
Step 5
Pour the resin into the base, filling it about a third of the way to the top of your balsa fence. Allow it to start curing as you mix the next, lighter-colored resin in a fresh plastic cup. Use very little paint to tint subsequent layers because the textured or painted base and the first layer of resin will provide most of the necessary color for your water.
Step 6
Pour the layer of resin onto the first, filling the remaining dammed-off area -- or leave room for a third layer and repeat Step 5.
Step 7
Once your resin is filled to the top of the dam, use a stir stick to slowly move the resin back and forth in a natural wave motion. Do not stir too vigorously or you will create bubbles that will cure in the resin, ruining the watery effect. Continue moving the stir stick until the resin begins to feel like a gel.
Step 8
Use the tip of the stir stick to shape the surface of the gelled resin, creating waves in the mixture. Attempt to duplicate the appearance of your reference photo's water. Continue to shape the surface until the resin hardens to the point you cannot mold it any further.
Step 9
Wait about 10 minutes, and then remove the balsa dam from around your resin water by pulling it gently from the base. To camouflage any exposed resin edges, you can add ground cover to your scene: Glue on imitation grass for the side of a lake, sand for the beach, or rocks for an ocean shore.
Video of the Day