Things You'll Need
14 pieces of 20-inch long string
Colored construction paper
Large piece of cardboard
Black permanent marker
Ruler
Scissors
Tape

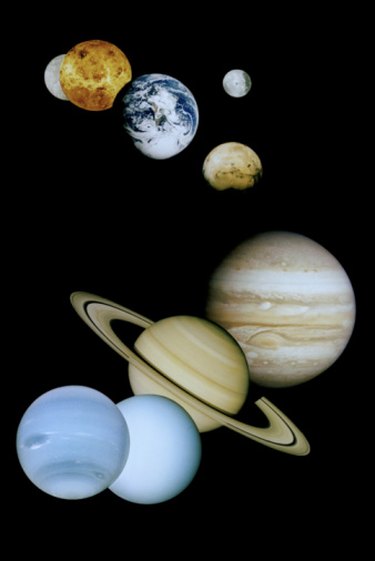
Use a solar system model made from cardboard and construction paper to help teach children about the planets. Or use is it as an idea for a science project in school science classes or during science fairs.
Creating a three-dimensional replica of the real thing using distinctive colors and different shapes is an effective way to entice children who learn best by seeing and touching. With a three-dimensional model of the solar system, children are able to better understand the different sizes and characteristics of each planet. Children will develop a stronger comprehension of how planets orbit around the sun.
Video of the Day
Step 1
Measure and draw a one-foot line on the cardboard using a ruler and a pencil. Measure halfway down the line to find the center and draw another one-foot line that runs perpendicular through the center of the first line. You should have a drawing that resembles a cross.
Step 2
Connect all four ends of the lines by drawing a circle around the cross. Cut the circle out using scissors.
Step 3
Draw four circles inside the outer-most edge of the cardboard circle, leaving about 1 to 2 inch of space between each circle. These will represent the orbits of the five farthest planets.
Step 4
Draw another circle about 4 to 6 inches inside the smallest circle you previously drew. This larger gap represents where the asteroids orbit.
Step 5
Draw three more circles inside the smallest circle, leaving about 1 to 2 inches of space in between each circle. You should now have four circles around the edge of the cardboard, a larger gap and four smaller circles drawn closer to the center.
Step 6
Take a piece of yellow construction paper and cut a large circle out to represent the Sun. The Sun should be the largest of all your planets.
Step 7
Take a red piece of construction paper and cut a very small circle out to represent the planet Mercury. This should be the smallest of all your planets.
Step 8
Take a white piece of paper and a blue piece of paper and cut out a circle that is three times bigger than Mercury. The white one will represent Venus and the Blue one will represent Earth. Both are of similar size.
Step 9
Cut out a circle from some red construction paper that is smaller than Earth and Venus but larger than Mercury. This will represent planet Mars.
Step 10
Cut out a large circle from brown construction paper to represent Jupiter. This should be your largest planet but still smaller than the Sun.
Step 11
Cut out a pink or purple circle that is slightly smaller than Jupiter to represent Saturn. Cut out extra strips of construction paper to represent Saturn's rings and secure them to the circle with some tape.
Step 12
Cut two circles out of dark blue and green construction paper that are slightly larger than the size of Earth. Green will represent Uranus and dark blue will represent Neptune.
Step 13
Cut out a purple circle that is roughly the size of the Mercury circle to represent Pluto.
Step 14
Write the name of each planet on each circle with a permanent black marker.
Step 15
Tape a length of string to each planet and the Sun. Place a piece of tape on the end of each string and begin to secure each planet on their corresponding orbits in various places along their orbiting circles. The Sun should be taped in the center and the first orbit circle should secure Mercury, then Venus, Earth, Mars, Jupiter, Saturn, Uranus, Neptune, and Pluto should fall on the very last orbit circle.
Step 16
Tape three pieces of string to the other side of the cardboard equally placed apart around the edges. Bring the ends together and tie them all up to secure them with another piece of string to hang your model.
Tip
Use a protractor or circular object to draw accurate circular shapes for each planet.
Video of the Day