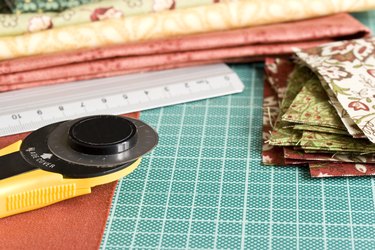
Things You'll Need
1 yard fabric for quilt squares
1/2 yard fabric for border
6 1/4 yards binding
46-inch square fabric for backing
46-inch square batting
Thread
Cutting mat
Rotary cutter
Acrylic ruler
Sewing machine
Scissors
Pins
Iron
Ironing board
Quilting hoop or frame (optional)
Hand quilting needles (optional)
Thimble (optional)
Tailor’s chalk (optional)

While beautiful, intricate quilts are often an enticement to learn to quilt, many beginners prefer to start with a smaller project. A lap quilt or baby blanket pieced from simple squares is a good introduction to quilting. This pieced quilt top can be completed in several ways: by alternating squares in two colors, by placing fabrics diagonally to form stripes or by using a different print for each square. The completed top is then stitched to the batting and backing to create the quilt.
Step 1
Spread the fabric on the cutting mat and use the ruler to measure 5 1/2-inch squares. Use the straight edge of the ruler as a guide for the rotary cutter. Cut 36 fabric squares. Cut four border pieces measuring 5 inches x 44 inches using the cutting mat, ruler and rotary cutter.
Video of the Day
Step 2
Spread out the quilt squares in a six-by-six grid pattern. Move the squares around until pleased with the design they make.
Step 3
Sew the bottom row of squares together into a strip using a 1/4-inch seam allowance and a straight stitch. Repeat with the other five rows. Press seams flat, facing the same direction.
Step 4
Sew the strips together in order, using a 1/4-inch seam and keeping squares lined up. Press the seams flat.
Step 5
Pin two border pieces to opposite sides of the quilt and trim the short edges to match the quilt. Stitch in place using a 1/4-inch seam. Repeat with the top and bottom borders of the quilt.
Step 6
Place the quilt batting on the wrong side of the backing. Center the pressed quilt top on the batting facing upward. Pin in place.
Step 7
Sew the layers together using the sewing machine or by hand using a quilting frame or hoop to stabilize the layers.
Step 8
Lay the quilt flat on the cutting mat and trim the extra batting and backing even with the quilt top. Trim the top to make the edges even and square, if needed. Sew on the quilt binding.
Tip
Tracing a design on the fabric with tailor’s chalk can make stitching the quilt design easier.
Creating the top of a quilt is called piecing or patchwork. Sewing the layers of the top, batting and backing is called quilting.
Quilting can be done on any sewing machine, although large quilts can be bulky. To keep the layers smooth, roll the edges inward while working in sections.
Warning
Rotary cutters have extremely sharp blades. Keep away from children and always keep the blade closed or covered when not in use.
Video of the Day