Things You'll Need
Stuffed animal pattern
Overhead projector
Scissors
Newsprint
Pencil
Plastic drop cloth
Brown wrapping paper
Iron
Wet/dry/vac
Large rubber band

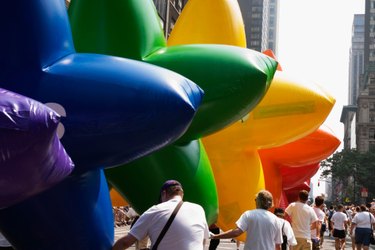
Inflatable sculptures range in size from a few inches high and fairly short to many feet high and quite long. The material used to make these sculptures is varied, with Mylar sheeting and heavy sheets of plastic, such as a painter's plastic drop cloth, among the most common components. Cartoon characters have an excellent round shape, which makes them good candidates to be models for inflatable sculptures. Make a simple inflatable sculpture from a stuffed animal pattern (such as those sold in fabric stores) that has six to eight pieces.
Step 1
Open the sewing pattern for a simple stuffed animal with 6 to 8 pieces. Enlarge each section to five times its original size. Place the pattern pieces on the surface of an overhead projector. Pull the projector back from the wall approximately 15 feet. Turn on the projector, and tape a piece of newsprint in front of the pattern piece projection. If necessary, tape several sheets together. Trace on the pattern line and repeat the process with the remaining pattern pieces.
Video of the Day
Step 2
Select two pattern pieces near the back of the animal shape and toward the bottom. Draw a rectangle 6 inches wide and 12 inches long and attach it to the pattern piece to form a hole for inflating the sculpture. For example, the back of a teddy bear has a rounded area to form the bottom of the bear so it will sit. Place the rectangles just above the curve. The rectangles must line up exactly so when they're connected, they make a tube through which you'll inflate the sculpture.
Step 3
Cut the paper pattern pieces from the newsprint. Spread the plastic painter's drop cloth on a flat area such as a concrete floor. Smooth out any wrinkles or bumps. Place the large pattern pieces on the surface of the drop cloth. Use a permanent marker to trace around the outside edge of the patterns. Remove the paper pattern pieces, and cut out each outline's pattern piece.
Step 4
Follow the assembly instructions in the sewing pattern. Line up the first edge. For example, a simple stuffed animal pattern requires the center front of the belly area as the first seam. Line up the center front seam of the plastic belly pattern pieces.
Step 5
Set an iron to the "cotton" setting to preheat. Lay a piece of brown packaging paper over the seam edge. Place the iron on top of the brown packaging paper in the location of the seam, and hold the iron in place for 15 seconds. Flip back the edge of the brown packaging paper. Check the seam to make sure the heat has melted together the two pieces of plastic. Repeat the process a second time if needed, and then repeat the process along the entire seam.
Step 6
Repeat Steps 4 and 5 to assemble all plastic pattern pieces. Iron only the long edges of the rectangular tube at the back of the sculpture. The narrow end is left open to accommodate a blowing device for inflating the sculpture.
Step 7
Slide a large rubber band 10 inches up the hose on a wet/dry vac. Insert the end of the hose into the rectangular tube you've made at the back of the inflatable sculpture. Pull the large rubber band over the plastic rectangular tube to hold it in place. Set the wet/dry vac to blow air out of the vac. Turn on the wet/dry vac and inflate the sculpture.
Video of the Day