Things You'll Need
Reference photos
Glue
Paintbrush
Cardboard boxes in various sizes
Measuring tape
Card paper in dark gray, navy blue, wine red or terracotta brown
Card paper or white cardboard
Colored markers
Craft knife
Cutting mat
White paper
Tape
Scissors

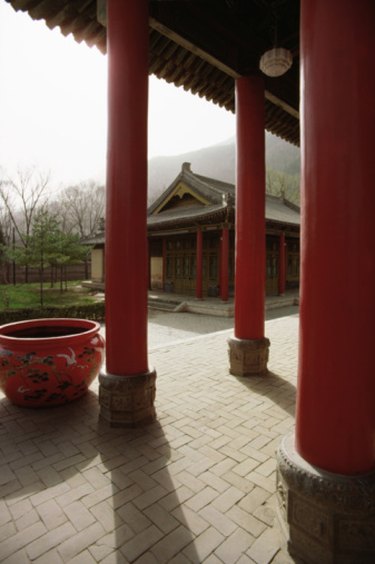
Traditional Chinese architecture includes distinctive wing roofs and decorative elements. For model making, cardboard and paper are easy materials to cut, decorate and shape. Paper houses are part of some traditional Chinese funeral rites, used as grave goods or as an offering to the ancestors as a symbol for the property the deceased will hold in the afterlife. As well as their spiritual purpose, paper models are also suitable for historical displays, such as dioramas.
Step 1
Look at reference photos of traditional Chinese houses and architecture. The Internet provides a large amount of free images to base your design on, whether you are making a palace or a small house.
Video of the Day
Step 2
Use cardboard boxes to decide on a layout for your building. An easy Chinese house style is a house with a courtyard in the center, which would use four rectangular boxes of the same height placed in a square, but there is a broad range of possibilities.
Step 3
Cover boxes with white paper as if wrapping a gift, to hide previous package labelling and make an easy-to-decorate surface. Use tape to secure the paper. Where possible, place seams where they will be hidden by corners, by the roof or by another part of the building.
Step 4
Glue boxes together into the shape you have chosen, by painting the connected faces with a thin layer of glue and pressing them together. Allow to dry.
Step 5
Use a contrasting marker with stiff card paper to draw a roof tile pattern. For wine red or terracotta paper, use a brown marker. For blue or grey, use a black marker. Draw a wavy lines in one direction and straight lines perpendicularly to make a grid pattern. Scale your grid to the sizing of your boxes.
Step 6
Gently roll your roof paper with the tile pattern inside, to create the curve found in a wing roof.
Step 7
Measure the tops of the boxes and cut the preprepared roof paper to fit, making a roof shape like an inverted V. The "wing" part of the roof should curve upwards, with the scalloped side of the pattern parallel to the roof ridge. Secure pieces together with tape placed on the nonpatterned side.
Step 8
Place roof on building to ensure fit and trim excess overhang. For L-shaped bends in the roof, measure the width of the roof when placed on the model and cut a square-sided notch in the opposing roof piece.
Step 9
Measure spaces between roof and boxes and cut triangular pieces of white card stock to fill in the area. Tape in place with tape on the inside.
Step 10
Where necessary, cover visible seams on the wrapped boxes with white paper. Use a thin layer of glue applied with a brush for a secure, even hold.
Step 11
Following your reference photos, decorate the white sides of the building to resemble the traditional wood and stone patterns used in Chinese architecture.
Step 12
Secure the roof to the building with tape, placing it on the unpatterned inside of the roof to prevent it from showing.
Tip
Use other models of plants or people, or cut out cardboard shapes to enhance your design. Match the thickness of your materials to the size of you design. A large model takes thicker cardboard than something on a small scale.
Warning
Use care when cutting with craft knives and scissors to avoid injury. Some markers contain toxic chemicals and should be used in a well-ventilated area.
Video of the Day