Things You'll Need
10- by 10-inch squares solid color fabric, 100 percent cotton
Backing fabric, 100 percent cotton
Quilt batting
Non-toxic fabric paints, various colors
Foam paintbrushes
Paper plates
1/2-inch-wide masking tape
Fabric markers, various colors
Sewing machine
Straight pins
Scissors
Hand-sewing needle
Cotton sewing thread
Quilting thread
Drying area
Soap
Water
Towel

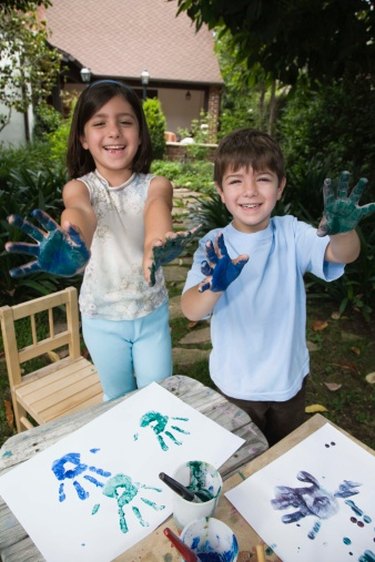
There are some things you just don't want a child's handprints on -- walls, windows, glass tables. When you put a child's handprint on a quilt, however, the result is a one-of-a kind creation that is sure to become a treasured keepsake. Handprint quilts are delightful gifts for teachers, grandparents, youth group volunteers, and anyone who works with kids. The best thing about a handprint quilt is that, even if you have no quilting experience, you can create one of these. The handprint personalization is so impressive that any quilting mistakes are quickly forgiven!
Get the Hand Prints
Step 1
Determine how many handprints you need to include on your quilt. Each print will get its own block. Be sure you have enough 10- by 10-inch blocks cut.
Video of the Day
Step 2
Place 1/2-inch-wide masking tape around the four edges of each quilt block. The tape creates a frame of sorts on the block and gives children a boundary in which to print so their handprint will not be hidden in a seam. The edge of the tape should be even with the fabric edge all the way around.
Step 3
Work with one child at a time to complete the design of his quilt block. Have the child write his name on the block with a fabric marker. The child should write near the tape so the handprint will not cover the name.
Step 4
Allow the child to pick a color of fabric paint for his handprint.
Step 5
Use a sponge paintbrush to smooth the fabric paint on the child's palms. You may find that pouring the paint onto a paper plate is an easier way to load the paintbrush.
Step 6
Press the child's palms onto the fabric. Gently push both palms against the fabric square to make sure to get a solid print.
Step 7
Move the fabric square aside and allow to dry according to the paint instructions.
Step 8
Help the child wash his hands with soap and water and dry them with the towel provided. Repeat until all the children have made handprints.
Make the Quilt Top
Step 1
Remove the tape from the quilt blocks and decide how to arrange them. Lay them out on a bed or other flat surface in the way you want them.
Step 2
Sew blocks together to create a row. Do this by taking the first two blocks and placing their right sides together. Stitch the side of the blocks together using the sewing machine, using 1/4-inch seams.
Step 3
Open the two blocks back up and finger press the seam allowance to one side underneath. Continue sewing, then opening, blocks until you have completed all the rows.
Step 4

Follow the same procedure until you have created all the rows of quilt blocks.
Step 5
Stitch rows to each other to create the length of the quilt. Place rows right sides together and then sew them together along the width, again using 1/4-inch seams.
Step 6
Open the two rows back up and finger press the seam allowance to one side underneath. Continue sewing, then opening, blocks and pressing seams aside until you have completed all the columns.
Assemble the Quilt
Step 1
Cut the backing fabric 4 inches larger than the quilt top all the way around. Lay the backing right side down on a flat surface and smooth it out.
Step 2
Lay the quilt batting on top of the backing and smooth it out.
Step 3
Lay the quilt top on the quilt batting with the right side up.
Step 4
Pin the three layers together with straight pins, starting in the middle and working out toward the corners. This is called pin basting.
Finish the Quilt
Step 1
Thread the hand-sewing needle or sewing machine needle with quilting thread.
Step 2
Use your chosen method of quilting to outline each of the handprints on the quilt. Be sure to remove the pins as you sew.
Step 3
Fold the excess backing in half toward the front of the quilt on one side.
Step 4
Fold the side of excess backing over again, this time pulling it over onto the quilt top. Use straight pins to hold the fabric in place.
Step 5
Sew the folded fabric to the quilt. Be sure the needle catches all three layers of the quilt. This is called binding the quilt.
Step 6
Continue to fold, then sew the other three sides of the quilt into place. When you get to the corners, simply finish them as though you were wrapping a gift.
Step 7
Double check to make sure you remove each pin. The handprint quilt is completed.
Tip
For a quicker quilt, use the tie-quilting technique instead of sewing around the hands. Try adding names with machine embroidery or hand embroidery instead of writing them with a fabric marker.
Warning
When pinning fabrics on floors or bedding, be careful not to snip through with scissors. Always use safety precautions when working with scissors and needles.
Video of the Day