Things You'll Need
Hammer
Nails
F-channels
Carpenter's level
Tape measure
Soffit panels
Circular saw
Fine-tooth blade
Safety goggles
Heavy-duty snips
T-channels
J-channels
Cornice panel

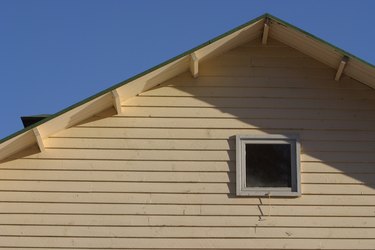
The eaves of your home are the points of the roof along the bottom edge which extend out and over the walls. In some home construction, the eaves are left exposed, which leaves the ends of the roof rafters visible. You can enclose the eaves by installing soffit panels. These are panels made of vinyl or metal that create a solid cover over the eaves.
Step 1
Nail down any loose fascia boards along the eaves. These are the boards that are nailed to the edge of the rafters.
Video of the Day
Step 2
Place F-channels along the bottom edge of the fascia, nailing them to the fascia every 6 to 12 inches. These are pieces of trim that look the the letter F when viewed from the end. Check the F-channel for level as you're installing it.
Step 3
Place a level on the bottom of the F-channel and position it so the other end of the level is against the side of the house. Make a mark on the side of the house to indicate the location of the F-channel. Do this once every foot for the length of the fascia. This provides you with a guide when installing the F-channel onto the side of the house so that the two F-channels are perfectly aligned.
Step 4
Install an F-channel on the side of the house, using the marks as a guide.
Step 5
Measure the distance between the inner edges of the F-channels on the fascia and the side of the house to determine the necessary width of the soffit panels. Subtract 1/4-inch from the distance to allow for the panels to expand and contract.
Step 6
Cut the soffit panels with heavy-duty snips or a circular saw that has a reversed fine-tooth blade. Wear safety goggles when using a circular saw.
Step 7
Install the soffit panels into the grooves on the F-channels. You may need to bend the panels slightly to get them to fit.
Step 8
Install the soffit panels in corners by first installing a T-channel or two J-channels back-to-back in the corner. These are strips of trim that resemble the letters T and J when viewed on edge. Cut the ends of two adjoining soffit panels at a 45-degree angle, then install them in the corner.
Step 9
Nail cornice panels at the end of the eaves where you can see the gap between the eaves and the soffit. The cornice panels can be made of metal, fiberboard or plywood, and can be painted to match the soffit.
Tip
Installing ventilated soffit panels can help ventilate your attic by drawing cooler air into your home.
Video of the Day