Things You'll Need
Screwdriver
Replacement needle
Small, stiff-bristled brush
Sewing machine oil

If you experience minor problems with your Singer 7436 Ingenuity sewing machine, you may be able to resolve them by looking for the most common causes. Improper threading, incorrect needle size or damaged needles, thread tension that's too loose or too tight and lint buildup can all cause your machine to bog down or stop working. Use the tools that were packed with your machine to clean lint, loosen and tighten screws, and apply lubricating oil, and you'll soon be sewing again.
Common Occurrences
Step 1
Turn on the power switch if your machine doesn't sew. If the power is on, raise the buttonhole lever when you're not using the buttonholer or lower the lever if you're making buttonholes.
Video of the Day
Step 2
Replace a damaged needle if your thread jams or your machine runs roughly. Turn the hand wheel toward you to raise the needle as high as it will go. Turn the needle clamp screw toward the front of the machine to loosen it, then slide the needle down and take it out. Position a new needle with its flat side facing the back of your machine. Push the needle up as far as possible and use the screwdriver to tighten the clamp screw.
Step 3
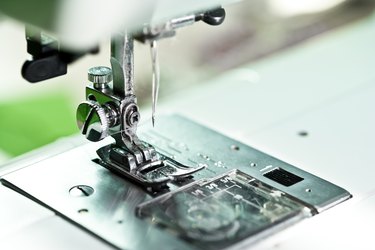
Clean the hook race if your machine jams or runs roughly. Turn the hand wheel to raise the needle as high as possible. Use the screwdriver to remove the two screws holding the needle plate. Take off the needle plate and pull the bobbin case out. Use the brush to clean the hook race and the feed dogs. Put one drop of sewing machine oil on the left side of the hook race, near the notch and one drop in the center indentation. Put the bobbin case back in place, making sure the protrusion on the bobbin case butts against the spring on the bottom right side of the hook race. Reposition the needle plate and use the screwdriver to tighten the two screws.
Step 4
Lower the presser foot if your fabric is not moving when you sew. If the problem persists, your stitches might be too short. Increase the stitch length and make sure the feed dogs are up.
Step 5
Turn off the twin-needle switch if you can't select a pattern. The switch shows a red light when it is turned on.
Stitch Errors
Step 1
Loosen the needle clamp screw and push the needle up as far as possible if your machine is skipping stitches. Use the screwdriver to tighten the screw. Replace a bent or otherwise damaged needle, or clean the hook race.
Step 2
Rethread your machine if it is still skipping stitches. Pass the thread through the thread guide on top of your machine, at the back, then into the pre-tension guide to the left, behind the lever-like plate. Bring the thread to the left of the plate and pull it through the the tension discs. Guide it to the end of the groove on the front of the machine, around the bottom of the groove and back up to the take-up lever. Pull the thread into the take-up lever, then bring it down and pass it through the thread guide above the needle. Thread the needle from front to back.
Step 3
Use the correct size needle if your stitches are not even. Select the needle size according to the fabric you're sewing. Consult the needle package for the correct size.
Step 4
Thread your machine correctly and rewind your bobbin if your stitches are still uneven. Guide the fabric through the machine without pulling or pushing it.
Step 5
Tighten the tension on the top thread if stitches are irregular. Lower the presser foot and turn the tension control knob on the top of your machine to the right. Make very small adjustments and test your stitches after each one. For straight stitching, the top and bottom stitches should look the same.
Step 6
Use the correct needle size if your needle breaks or make sure to push the needle up as far as possible when you insert it. Avoid pushing or pulling your fabric as you sew.
Video of the Day
Thread Issues
Step 1
Pull about 4 inches of the upper thread and the bottom thread behind the needle before you start sewing if your thread bunches. Hold the thread as you sew the first few stitches.
Step 2
Thread your machine correctly, loosen the top tension, use the correct size needle or replace a damaged needle if the upper thread breaks.
Step 3
. Clean the bobbin case and hook race if the bobbin thread breaks.
Step 4
Thread the bobbin correctly if your bobbin thread breaks. Turn the hand wheel toward you to raise the needle as high as possible. Push the release tab to the right of the bobbin plate. The plate will move upward so you can take it off. Put the filled bobbin into the bobbin case with the thread coming off the bobbin in a counterclockwise direction. Pull the thread toward you through the slot on the center bottom of the bobbin case. Hold the bobbin lightly with a finger as you bring the thread around and up through the second slot, to the left of the first. You should feel a slight tug as the thread catches in the slot. Pull about 6 inches of bobbin thread and position it toward the back of the machine. Replace the bobbin cover plate.
Step 5
Loosen the top tension if your fabric puckers. If you're sewing sheer or very soft fabric, use a shorter stitch length to prevent puckering.