Things You'll Need
Cotton or linen fabric, 1 yard
Scissors
Measuring tape
Cardboard
Ironing board
Iron
Thick jersey fabric, 1 yard
Mesh fabric, ½ yard
Heat fusible bonding tape
Hot glue gun loaded with glue stick
Fabric chalk

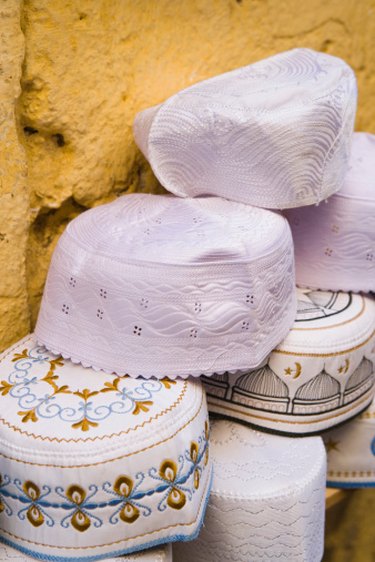
The kufi cap is traditionally worn by Islamic African men, although you may see the hat style adorning men's and women's heads in cultures throughout the world. The cap, also known as a Hausa hat, is a fashion accessory enjoyed by many non-African westerners. Some kufi caps are woven from yarn, but many are sewn together and constructed from thick, embroidered fabrics. Make your own kufi cap to wear as a fashion accessory or a cultural or religious garment.
Step 1
Wrap the measuring tape around your head just above your ears and across your forehead. Tighten the tape until it's snug against your head but not too tight. Note this measurement.
Video of the Day
Step 2
Cut your cotton or linen fabric and your jersey fabric to 5 ½ inches wide and as long as your head circumference measurement, plus 3 inches. You'll use the cotton or linen fabric for your cap's band, and the jersey fabric for a lining. Spread your band material piece lengthwise across your ironing board.
Step 3
Cut a section of cardboard that measures 2 inches by about 3 feet. Lay this cardboard piece across your band material, and line up the bottom edges. Roll up the cardboard piece once and take material beneath it with it. The cardboard piece should now be completely covered by fabric, with only its top edge exposed.
Step 4
Add a generous coat of hot glue to the top of the fabric covering the cardboard piece. A 1 ½ inch fabric section remains above the cardboard piece. Fold that section over the cardboard piece, on top of the glued fabric. Grab the edge of the cardboard piece and pull it out of the fabric band you just created.
Step 5
Iron the band to create two crisp folded edges, and to help spread the glue evenly between the two fabric pieces. This will also stiffen the band. Repeat the process with your lining material piece, but use your hem tape inside the folded band instead of hot glue. You now have a stiff but flexible lining band of fabric that is 3 inches longer than your head circumference and is 2 inches wide, and you have a decorative covering for it with the same measurements.
Step 6
Fit the lining band around your head, where you took your measurements earlier. Note how much extra length your lining band has, and cut all but 1 inch away. Glue the band's extra inch of length to the other end of the band, creating a circle.
Step 7
Lay out your mesh fabric. Put your assembled band on top of it. Draw an outline about a ½ inch around the outside of the band. Remove the band and cut out the circle you just drew. Place the circle back on your work surface, and center the band over it. Run a bead of hot glue around the ½ inch of fabric exposed around the band's circle, and then pull up that fabric so it sticks on the band. Your hat's top is now attached to the band lining.
Step 8
Fit your remaining fabric band, which was the decorative band covering, around your hat's band lining. Trim away all excess length except for one extra inch. Turn in your decorative band's ends ½ inch and glue them closed.
Step 9
Hang the hat over the side of the ironing board's tip, so you can easily work with the hat. Attach the decorative band over the band lining with fusible hem tape and your iron's heat. Make sure to make the band's ends meet in the back of the hat.
Video of the Day