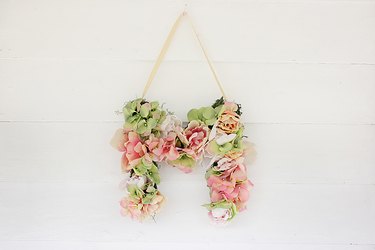
Rather than busting your wedding budget by ordering custom monogrammed artwork, make a budget-friendly silk floral version instead. It will impress guests as a striking centerpiece, eye-catching wall art or even a colorful cake topper, and you can repurpose it as home decor after the wedding as a keepsake.
Things You'll Need
Video of the Day
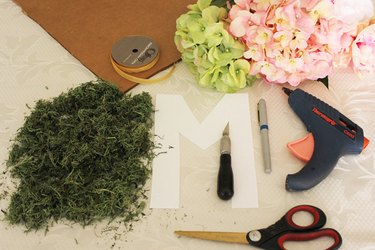
- Silk flowers, varying sizes
- Cardboard
- Letter stencil
- Card stock (optional)
- Box cutter
- Scissors
- Ribbon
- Reindeer moss
- Glue gun
- Pen or marker
Video of the Day
Tip: If you can't find a letter stencil large enough for the size you'd like to make, you can either hand draw a letter or print one on card stock and cut it out.
Step 1: Trace the Stencil

Lay your stencil on the piece of cardboard and trace the outline onto the cardboard.
Step 2: Cut the Letter Out
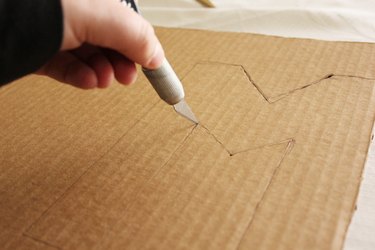
Using your box cutter, carefully cut out your cardboard monogram letter. Don't worry if you don't cut a perfectly straight line; the flowers will cover any uneven lines.
Step 3: Create Holes for Hanging
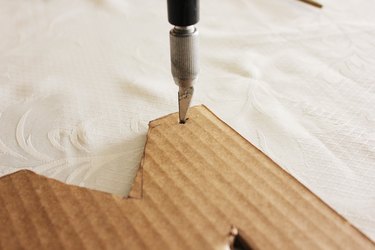
Make two holes at the top of the letter with the box cutter. These holes will allow you to tie a ribbon through the top of the letter and hang it on a wall. If you don't plan to hang your floral monogram, you do not need to create the holes.
Step 4: Cut Ribbon for Hanging
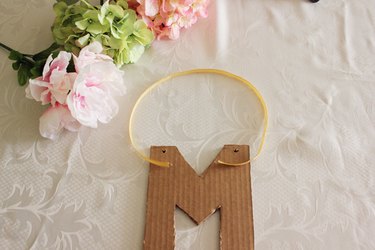
Cut a piece of ribbon to tie onto the cardboard letter. The ribbon length depends on the size of the letter and how low you want your floral monogram to hang. For the 12-inch letter pictured, a 22-inch piece of ribbon was used.
Step 5: Knot the Ribbon
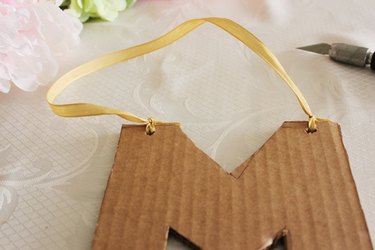
Thread the ends of the ribbon through the holes at the top and tie each side in a tight knot.
Step 6: Trim the Stems
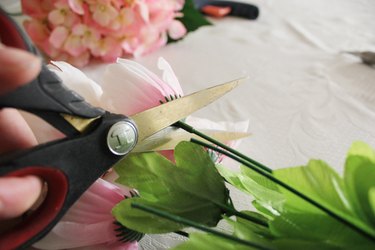
Trim the stems off your silk flowers. Cut as close to the flower as you can without causing the flower to fall apart.
Step 7: Glue the Largest Flowers
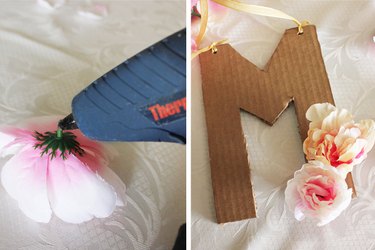
Start with the largest flowers; place a small dab of hot glue on the bottom of each flower and place it on the cardboard letter. Hold the flower in place for a few seconds to allow the glue to dry. Continue to add the remainder of the large flowers.
Step 8: Glue the Smaller Flowers
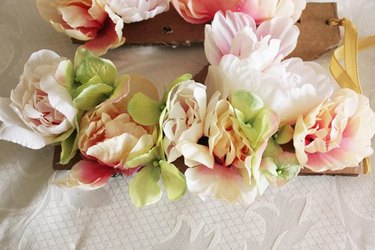
Glue the smaller flowers in between the large blossoms. Add as many small flowers as possible to make the monogram appear full and voluminous.
Step 9: Sprinkle the Moss
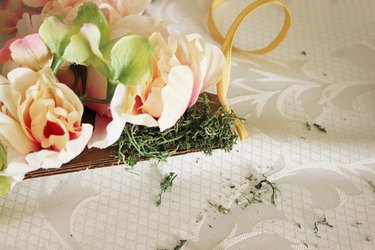
Place a small amount of hot glue on the sections of cardboard that are still exposed and sprinkle the reindeer moss over the glue. Use the end of a pen or marker to gently push the moss into the glue and secure it in place.
Step 10: Cover the Edges
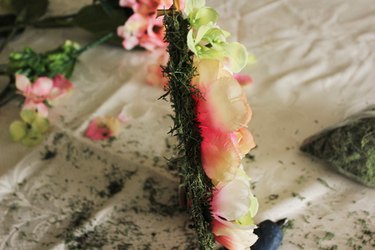
Cover the exposed cardboard edges by gluing the reindeer moss along the outside edges of the letter.
Note: If you plan to use the monogram as a cake topper, you may want to glue flowers and moss to the back side of the cardboard as well.
Hang or Display the Monogram
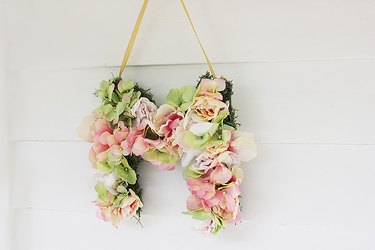
The floral monogram is ready to hang or display after the glue has completely dried.
Tips and Warnings
- Use caution while using the box cutter and hot glue gun.
- Instead of reindeer moss, use Spanish moss or any other greenery filler that coordinates with your wedding colors.