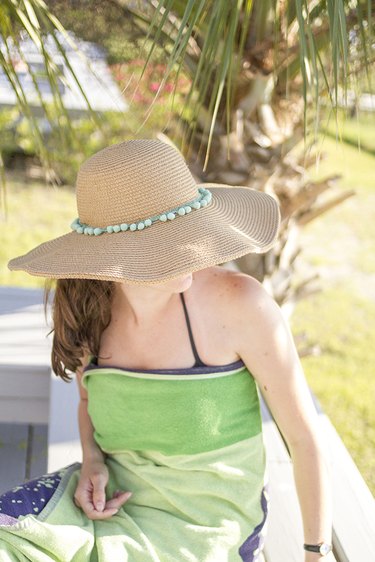
Despite the fact that wide-rimmed beach hats fill store shelves during spring and summer, it can be hard to find one with your idea of the perfect trim and favorite accents. Take matters into your own hands by adding custom pompom trim in your favorite color scheme, without even having to pick up a needle or thread.
Things You'll Need
Video of the Day
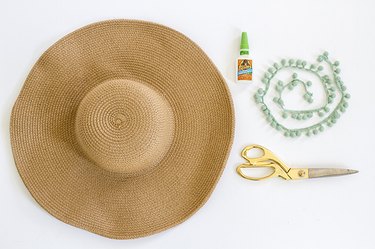
- Wide-brim beach hat (woven fiber, canvas or fabric)
- Pompom trim
- Scissors
- Super-hold glue (hot glue or fabric glue also will work)
- Pearl-topped fabric pins (not pictured)
- Jeweled appliqués, ribbon or bows (optional)
Video of the Day
Tip: Lay your accents on the hat in different configurations without gluing it down so that you can decide on the look.
Step 1: Measure and Cut the Trim
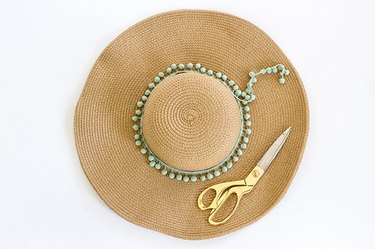
Lay the hat on a flat surface, and wrap the pompom trim around the circumference of the hat, right where the top meets the rim. (If you prefer, you can follow the same steps to add pompoms to the outside edge of the hat instead.) Use scissors to cut off the excess trim, leaving about 1 inch of extra trim at one end.
Step 2: Add a Line of Glue to the Hat
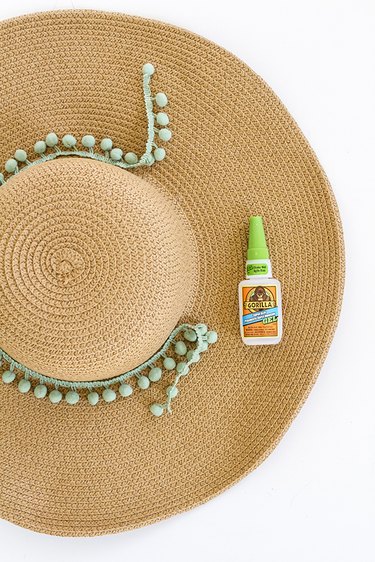
Squeeze a line of glue about 6 inches where the top half of the hat meets the rim. Press the beginning of the cut pompom trim to the line of glue, but don't let the pompoms touch the adhesive. Hold it in place for 30 seconds. Repeat the steps every 6 inches until you have the entire length of trim glued in place. Use scissors to cut off the excess trim.
Step 3: Pin the Trim in Place
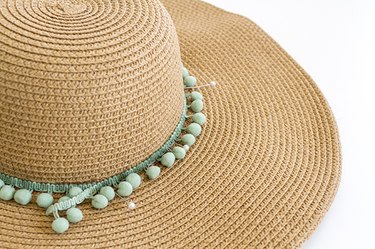
Push pearl-topped fabric pins through the pompom trim and into the woven texture of the hat. This will ensure a strong hold as the glue continues to set. Allow it to dry for 24 hours. If you're looking for more interest, use multiple layers of pompoms or add other flair.
Step 4: Wear It in the Sun

After the 24 hours is up, remove the fabric pins. Because the super-hold glue is so strong, it's waterproof, too Now you can enjoy your custom accented hat all season long.