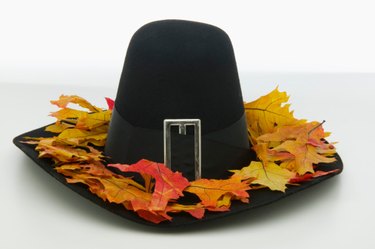
Holidays are learning opportunities in classrooms. Children learn the history of the Pilgrims' coming to Plymouth Rock, and how the Pilgrims and the Native Americans overcame their differences to become friends. That first celebratory meal they shared is now known as Thanksgiving. Many classes honor that tradition and not only re-create a Thanksgiving meal but also wear hats in styles worn by Pilgrims. There are many patterns available for creating Pilgrim head-wear.
Pilgrim Hat for Boys
Video of the Day
Materials for this boys' hat are readily available: 10-inch by 13-inch black construction paper, 9-inch by 12-inch gray construction paper, tape or glue, scissors and a pen or pencil. Cut a large oval from the black paper. Cut out a strip of gray paper to make a band that will fit around around the boy's head and tape it end to end. Put that slightly oval band on the paper and trace the inner circle. Draw a circle around the outside of it, leaving a 2-inch brim on three sides of the hat and a 4-inch brim on the front of the hat. Draw a trapezoid, cut out all the gray parts. Cut a band and a buckle from the gray paper. Glue on the hat band and the buckle.
Video of the Day
Pilgrim Bonnet for Girls
This bonnet pattern is easy to make in just about any size. You will need an 11-inch by 14-inch sheet of white thin card stock paper, a glue stick, white ribbon and tape. Fold a strip about 2 inches wide the entire length of the paper; this forms the front rim of the bonnet. Fold the paper in half, leaving the fold just made on the outside. Fold the back of the bonnet over 1/2-inch and inch and glue it to keep it in place. Tape or glue two pieces of ribbon to the front of the bonnet to be able to tie it.
Realistic Looking Pilgrim Bonnet
This Pilgrim bonnet looks the most like the ones worn by the women at Plymouth Rock, but should be made with supervision or only by older children. You'll need an 11-inch by 14-inch piece of heavy white paper, white yarn, a stapler, hole punch and scissors. Lay the paper horizontally on a work area. Fold the bottom half up 1-inch to make a lip. On the other long side of the paper, right in the middle, cut out a 2-inch long by 3-inch wide tapered square, narrower at the top. Flip the paper over, leaving it horizontal. Fold each corner down to the middle of the paper, slightly layering on end over the other. Staple the top by where you made the cut-out and then the bottom. Attach two pieces of 8-inch ribbon or ties to the corners.
Traditional Pilgrim Colonial Men's Hat
This particular Pilgrim hat is more traditional. Materials needed are black felt, one in a rectangle, one in a circle, white chalk, a hot glue gun, scissors, a bright colored felt strip and a feather. Wrap the rectangular piece of felt around the child's head, overlapping slightly and gluing it together. Place the hat top in the middle of the felt circle and trace around the edges leaving three inches for the hat brim. Use chalk to divide the circle into eight equal pie type pieces. Cut along the pieces without cutting around the outside of the circle so that you end up with eight pointed flaps. Slide the circle over the top of the hat, leaving the eight pointed flaps sticking up, fold back each flap and glue one at a time onto the hat top. Glue the colored felt band so that it covers the band and add a feather.