Georgette fabric has fluid qualities that make it attractive to designers and garment sewers who like to drape, layer and experiment with techniques and patterns. Georgette poses special challenges because it slides around when you work with it, and it frays easily. A few tips will help you when sewing with georgette fabric.
Pattern Selection
Video of the Day

Because seams and darts will show through georgette, select a pattern with minimal seams, darts and facings. Pattern details suitable for georgette include pintucks, ruffles and ruching.
Video of the Day
Cutting

To prevent the fabric from sliding out of place during cutting, pin the georgette to a backing such as newsprint, lightweight flannel or alpha-numeric sewing paper marked with a grid of 1-inch squares. Pin the pattern pieces through the georgette and the backing. For best cutting results, use finely serrated scissors or a rotary cutter. Cut through all layers.
Seams

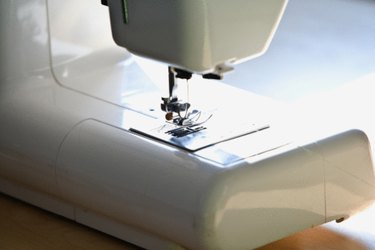
To prevent georgette seams from puckering, use a new size 70/10 needle and a short stitch length. Place a layer of tissue paper under the georgette while stitching to prevent the needle from pushing the georgette into the hole in the throat plate. Tear the tissue off after stitching. As you stitch, keep the fabric taut by holding it front of and behind the needle. For other options, try a roller foot or a walking foot to see which techniques yield the best results.
Seam Finishing
Georgette ravels unless you finish the edges. If you prefer not to serge the seam allowances, you can finish curved seams by binding them with sheer bias-cut tricot. Trim the seam allowance to 1/4 inch, fold the tricot over the seam allowance and zigzag through all thicknesses. (See References 5, p. 95) To finish straight seams, try a French seam or a mock French seam. For a French seam, stitch a 1/4-inch seam with wrong sides together. Press, trim to 1/8 inch and fold the seam with right sides together. Press and stitch again 1/4 inch from the fold to encase the raw edge. For a mock French seam, stitch with right sides together. Press the seam open and press the seam allowances in half so the raw edges meet at the stitching line. Sandwich the two sides of the seam allowance together to encase the raw edges and stitch next to the fold.
Hemming

To create an easy bulk-free hem, serge the raw edge, press up 1/2 inch, and straight stitch the hem into place. For a rolled hem, machine baste 1/4 inch from the lower edge, press up along the basting and stitch close to the fold. Trim off the extra fabric above the stitching, fold up another 1/4 inch, press and stitch.
- Sew Grand: Tips and Techniques
- Grandma’s Sewing Cabinet: My Fabric Information Assignment
- Burda Style: Sandra Betzina on Sewing with Sheer Fabric
- Bella Online: Working With Sheer Fabrics
- Atlas Levy Sewing Machine Company: Guide Marking Alpha Numeric Paper 48 Inches X 100 Feet
- Sew Easy Windows: Workroom Cutting Techniques – Introduction