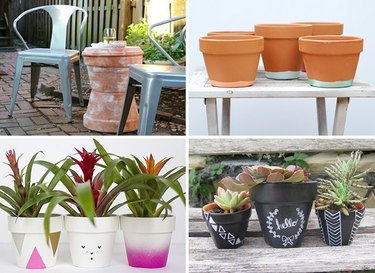
Turn your extra plant pots into an assortment of new creations for use indoors and out. Repurpose the pots into new pieces such as patio tables or a decorative lighthouse, or repaint them for fresh new looks. Even broken terra-cotta bits can be given new life as parts of a fairy garden.
1. Lace-Adorned Pots
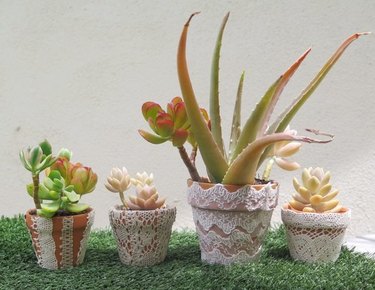
Upgrade an ordinary, uninspiring plant pot with a new lace finish. Cut bits of lace from lacy ribbons or doilies, and then glue them onto the sides or rim of a clean terra-cotta pot for an almost instantaneous update. Use a clear-drying glue, applied directly to the terra cotta, for the cleanest look.
Video of the Day
Video of the Day
2. Perk Them Up With Paint
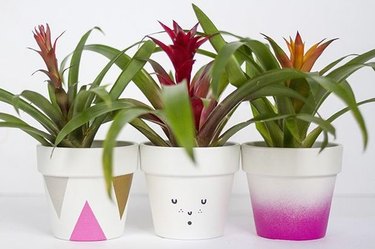
Instead of suffering from terra-cotta overload, paint those plant pots <ahref="http: www.ehow.com="" about_4572185_ideas-painting-flower-pots.html"=""> </ahref="http:>to suit your own favorite color schemes or styles. Coat the pots with a white stain-blocking primer/paint, and then embellish them with whatever colors you like. Spray the bottom half of each pot for a dip-dyed or ombre look, or create geometric shapes by masking off areas with painter's tape before applying acrylic craft paints. Create cute animal faces on the sides of pots for a dash of humor with a side of cuteness.
3. Chalk Talk
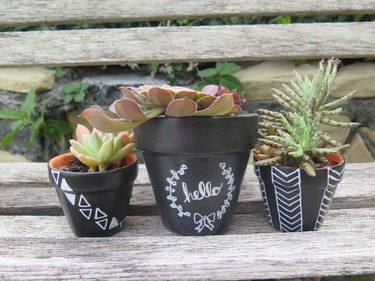
Jazz up a few clean terra-cotta pots with brush-on or spray-on chalkboard paint for planters that can change their look anytime you like. After the paint cures completely, decorate the pots with geometric shapes, a special greeting or a patterned print made with chalk pens. Wipe the designs away and start again when you wish to change your artwork.
4. Hand-Painted Pots
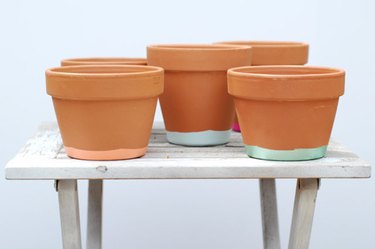
Add a hint of color to the bottom of clean terra-cotta pots for a simple, stylish adornment. Tape off an area near the bottom of the pot, and then paint below the tape line with acrylic craft paint. Paint several pots in different shades to create playful effects such as ombre or rainbow assortments.
5. Stacked Pot Side Table
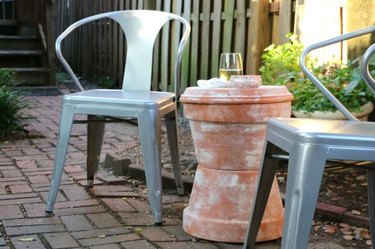
Turn large terra-cotta pots into an attractive side table, and enjoy a glass of lemonade or iced tea on the patio. Give the pots a weathered look by mixing water and garden lime, brushing it over the pots, and then sanding some of the lime off when it dries. Stack the pots bottom to bottom for a simple temporary table, adding a large plant saucer as the tabletop. Make the table more permanent by holding it together with a durable adhesive.
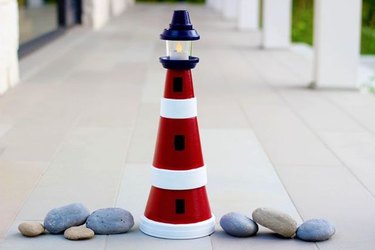
6. Lovely Painted Lighthouse
Craft this terra-cotta lighthouse yourself, or allow children to help out or make their own. Paint and then stack large, medium and small pots for the main lighthouse shape, and then add a small saucer, a votive holder and a small upturned saucer for the top of the lighthouse. A tiny upturned plant pot caps off the creation. Use a durable adhesive to hold it all together.
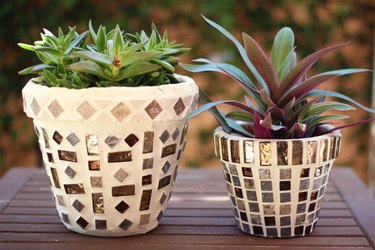
7. Marvelous Mosaic Pots
Turn a new or even a not-so-pretty terra-cotta pot into a marvelous mosaic using tiles and grout. The tiles may be glass, ceramic or stone, or you could use a collection of polished sea glass or river rocks for a completely different look. Make a paper template of the pot to plot out a design, and then set the tiles atop the paper to prepare them for placement. Glue them on with a durable adhesive, and then apply a premixed grout between the tiles to finish the look. Wipe away excess grout while it's still wet.
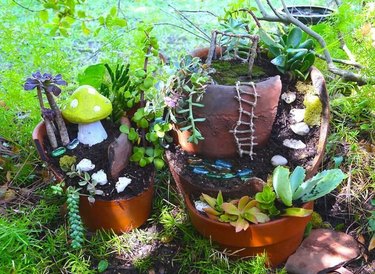
8. Broken-Pot Fairy Garden
Even broken and cracked terra-cotta pots aren't without value. Transform them into a fairy garden, complete with adorable accoutrements. Arrange pots so those that can still hold dirt sit at the bottom. Add dirt and more broken pot bits to create winding paths and tiny garden areas for fairies and their friends. Plant a few succulents or add a mossy lawn to create the fairy's yard. Arrange tiny faux mushrooms, rope ladders, attractive stones and whatever fairy treasures you can find to complete the look.
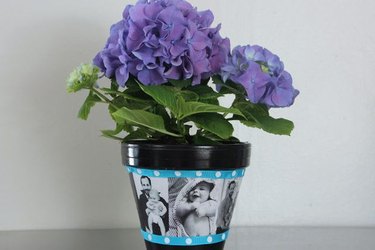
9. Personalized Memory Pot
Create a gift-worthy keepsake by decorating a pot with paints and family photos. Paint a clean terra-cotta pot and decoupage photos over it, collage style, after the paint dries. Glue decorative ribbon around the perimeter of the photos for an added touch.
