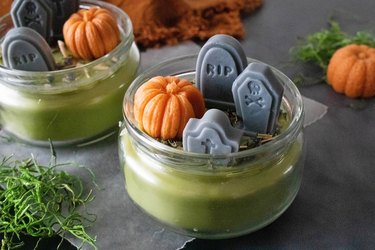
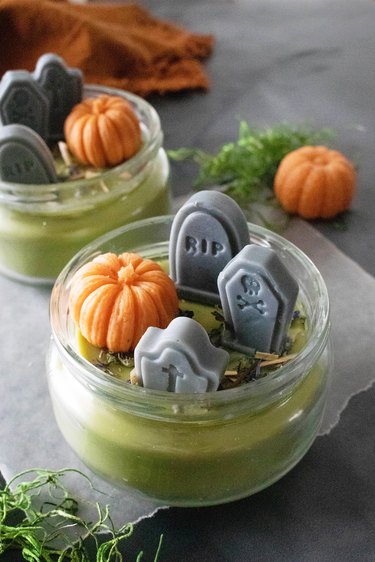
If you love seasonal candles, you have to add this graveyard candle to your Halloween to-do list. It's equal parts spooky and cute, and it's surprisingly easy to make.
Inspired by our charming succulent terrarium candle, this version offers a seasonal twist on the concept. It starts with a green candle base to represent the ground or grass. Next, the candle is topped with dried herbs and flowers for texture, followed by mini gravestones and pumpkins made of wax. The result is a Halloween scene that can instantly glow up your space.
Video of the Day
Video of the Day
If you'd like to light your DIY graveyard candle, feel free to add candle-safe fragrance oils to the melted wax. Otherwise, you can skip the fragrances and make a purely decorative piece. Here's how to make it!
Base Candle
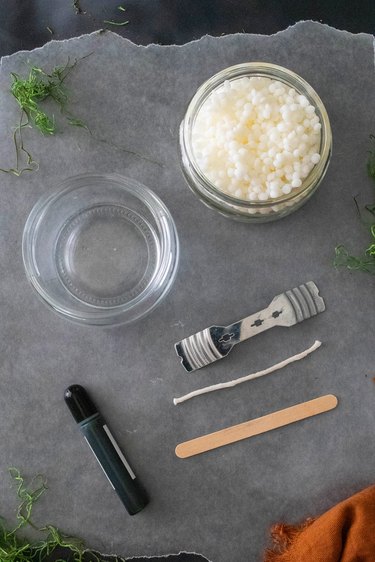
Things You'll Need
Candle wax
Wide-mouth jar or glass container
Candle wick holder
Candle wick
Green candle dye
Stirring stick
Heat-safe measuring cup, for melting wax
Wick trimmer or scissors
1. Melt and dye the candle wax
Melt the wax according to the package's instructions. Add green candle dye, keeping in mind that the dye will look lighter when the candle hardens. Mix well.
Tip
The exact amount of candle wax and dye depends on many factors, including your specific type of wax and the size of your container. If possible, prepare a test candle before making the real thing. This will give you an idea of how much wax and dye to use.

2. Pour the candle wax
Place the wick holder on your container and then add the wick. Carefully pour the melted candle wax into the container.
Tip
Don't worry about centering the wick perfectly. Since it will be surrounded by other wax pieces, its exact position won't be noticeable.

3. Let the candle harden
Let the candle sit overnight or until it's completely set. Trim the wick with a wick trimmer or scissors.

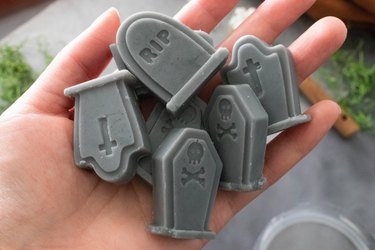
Wax Gravestones
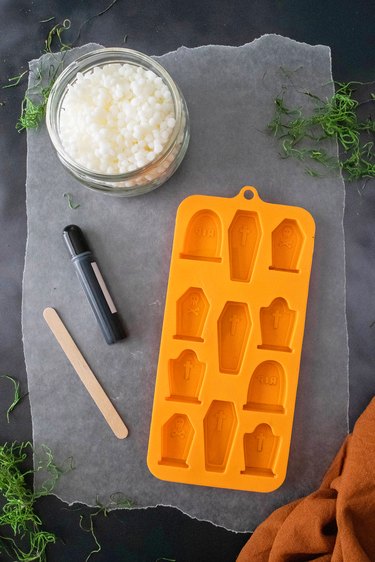
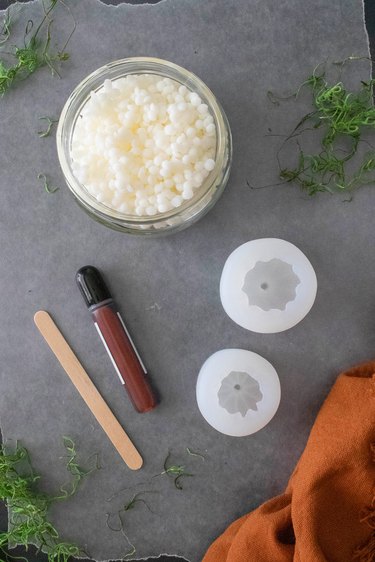
Things You'll Need
Candle wax
Mini gravestone mold
Black candle dye
Stirring stick
Heat-safe measuring cup, for melting wax
Tip
Look for gravestone molds in the baking or candy section of your craft store.
1. Melt and dye the candle wax
Melt a small amount of candle wax. Follow the package's directions. Add black dye and mix well.
Tip
Remember that when the candle sets, the dye will be a lighter color. For the gravestones, aim for a gray color. This means you should add less than you'd use for a saturated black candle.

2. Pour the wax into the mold
Carefully pour the dyed wax into the gravestone mold.
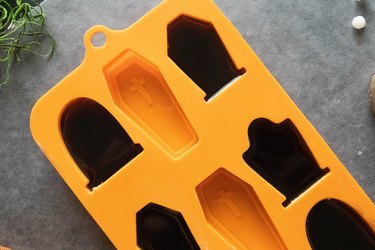
3. Let the wax harden
Let the wax sit for a few hours or overnight. Once the wax has hardened, remove the gravestones from the mold.
Don't worry if there are nicks or scratches on the gravestones, as this will emphasize the overall spooky graveyard look.
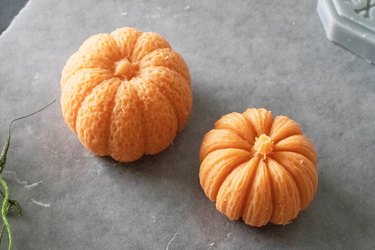
Wax Pumpkins
Things You'll Need
Candle wax
3D silicone pumpkin molds
Orange candle dye
Stirring stick
Heat-safe measuring cup, for melting wax
1. Melt and dye the candle wax
Melt a small amount of candle wax, making sure to follow the package's instructions. Add orange candle dye and stir well.

2. Pour the wax into the molds
Carefully pour the candle wax into the silicone pumpkin molds.

3. Let the wax harden
Let the wax harden for a few hours or overnight. Then, remove the pumpkins from the molds.
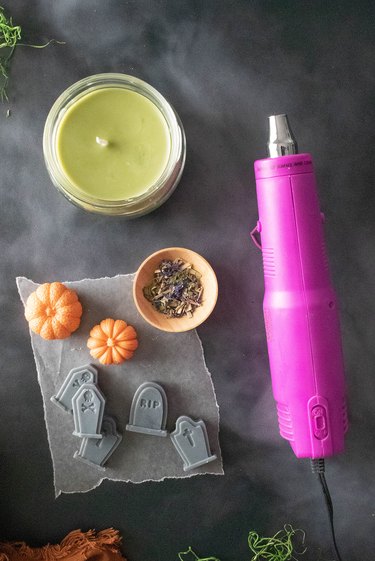
Making the Graveyard
Things You'll Need
Green candle
Wax gravestones
Wax pumpkins
Dried flowers or herbs (optional)
Heat gun
1. Melt the top of the candle
Using the heat gun, melt the top layer of the candle. It should look like a thin film of liquid is sitting on top.
Warning
Slowly move the heat gun across the candle. If you move it too fast, it can cause the hot wax to splash out of the jar.

2. Decorate the candle
While the top of the candle is still melted, add dried flowers and herbs if desired. Add the wax gravestones and pumpkins, gently pressing them into the candle.
You can also cut a wax gravestone in half and place it on the candle. This will vary the height of the gravestones, adding visual interest.
Tip
If the candle rehardens too quickly, carefully warm the bottom of the gravestone or pumpkin with a lighter for a few seconds. You can also hold it over the open flame of another candle. To protect your fingers, use tongs to hold the wax piece. The wax only needs to be slightly melted to stick to the candle, so avoid doing this for too long.
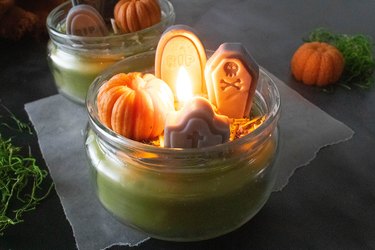
3. Light the candle
Light the candle as you normally would — or leave it as is for a decorative piece. Either way, your scarily cute candle is ready for the season.
Happy Halloween!