How to prepare your car for summer: 9-task checklist
Summer asks more of a car than any other season. Cooling systems face continuous strain, fluids degrade faster as temperatures climb, and batteries take a quiet hit from heat that often won't show up until a cold morning months later. The nine tasks below target exactly that: the systems most likely to fail under summer conditions or on a long highway stretch.
This is a pre-season checklist, not a full-service guide. A few tasks take five minutes in the driveway; others require a shop visit. Both are labeled. The goal is to get through this list before the first real road trip of the year.
What you'll need: Your owner's manual, a tire pressure gauge, and about an afternoon. Everything else is visual inspection or a short test run.
Summer car maintenance checklist: start with tires, cooling, and fluids
Video of the Day
Heat and highway miles stress these three systems more than any others. Start here, then work outward.
Task 1: Check tire pressure and tread depth
DIY
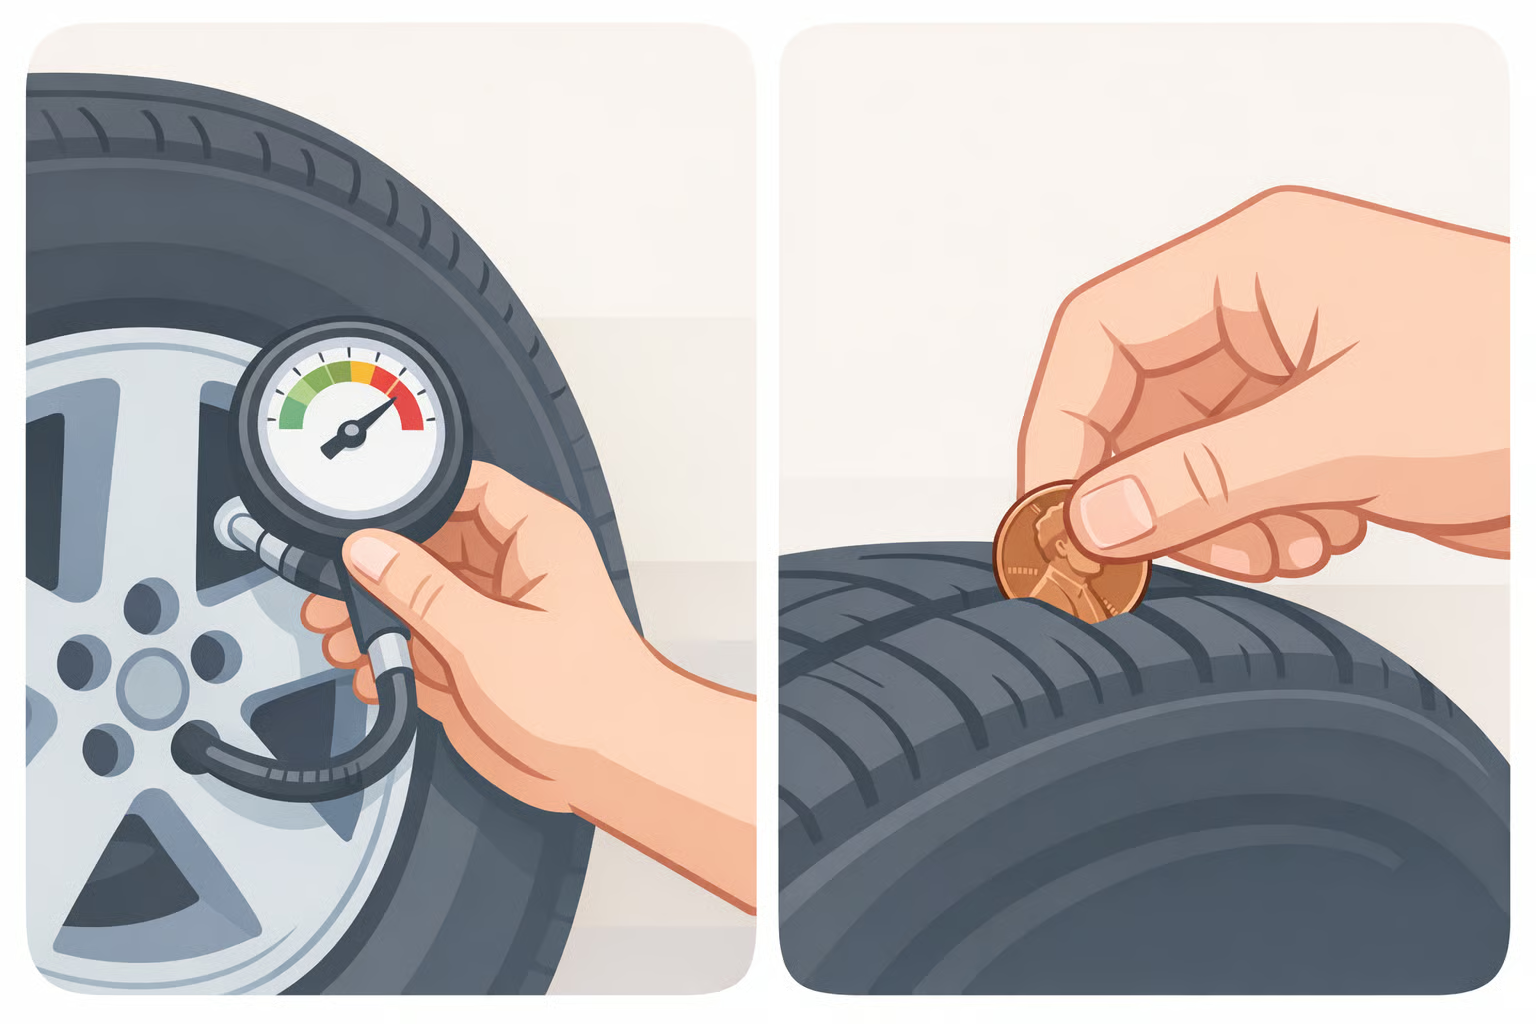
Find the correct inflation figure on the sticker inside the driver's door jamb, not the number molded into the sidewall. The sidewall number is the tire's maximum safe pressure, not the recommended operating pressure, and inflating to it will give you an overinflated tire (NHTSA; Cars.com).
Check pressure when the car has been parked for at least three hours. Air expands with heat, so a warm-tire reading runs artificially high. The general rule: pressure shifts roughly 1 psi for every 10-degree change in air temperature (Cars.com).
For tread depth, use the penny test: insert a penny into the groove with Lincoln's head pointing down. If the top of his head is visible, tread has dropped below the 2/32-inch minimum and the tire needs replacing. Uneven wear across the width usually means an alignment problem, not just low pressure (AAA Oregon/Idaho; NHTSA).
Some manufacturers recommend replacing tires at six years regardless of remaining tread. AAA Oregon/Idaho puts the general replacement window at six to ten years; your owner's manual has the specific guidance for your vehicle.
Two things worth knowing:
- The tire pressure monitoring system (TPMS) light activates when pressure drops to roughly 25% below the recommended level. By that point, handling is already affected. Don't use the light as your baseline (Cars.com).
- Check the spare. Compact "donut" spares often require around 60 psi, far higher than regular tires, and they lose air slowly over time whether used or not (Cars.com).
Don't drive until checked if: the TPMS light stays on after inflation, or any tire shows sidewall bulging, embedded objects, or cracking.
Task 2: Inspect the cooling system
DIY check / shop if abnormal
High temperatures put additional strain on the radiator, water pump, thermostat, and cooling fans. A system that handles spring driving without issue can tip into overheating territory on a hot highway afternoon (Locke Auto & Diesel Repair).
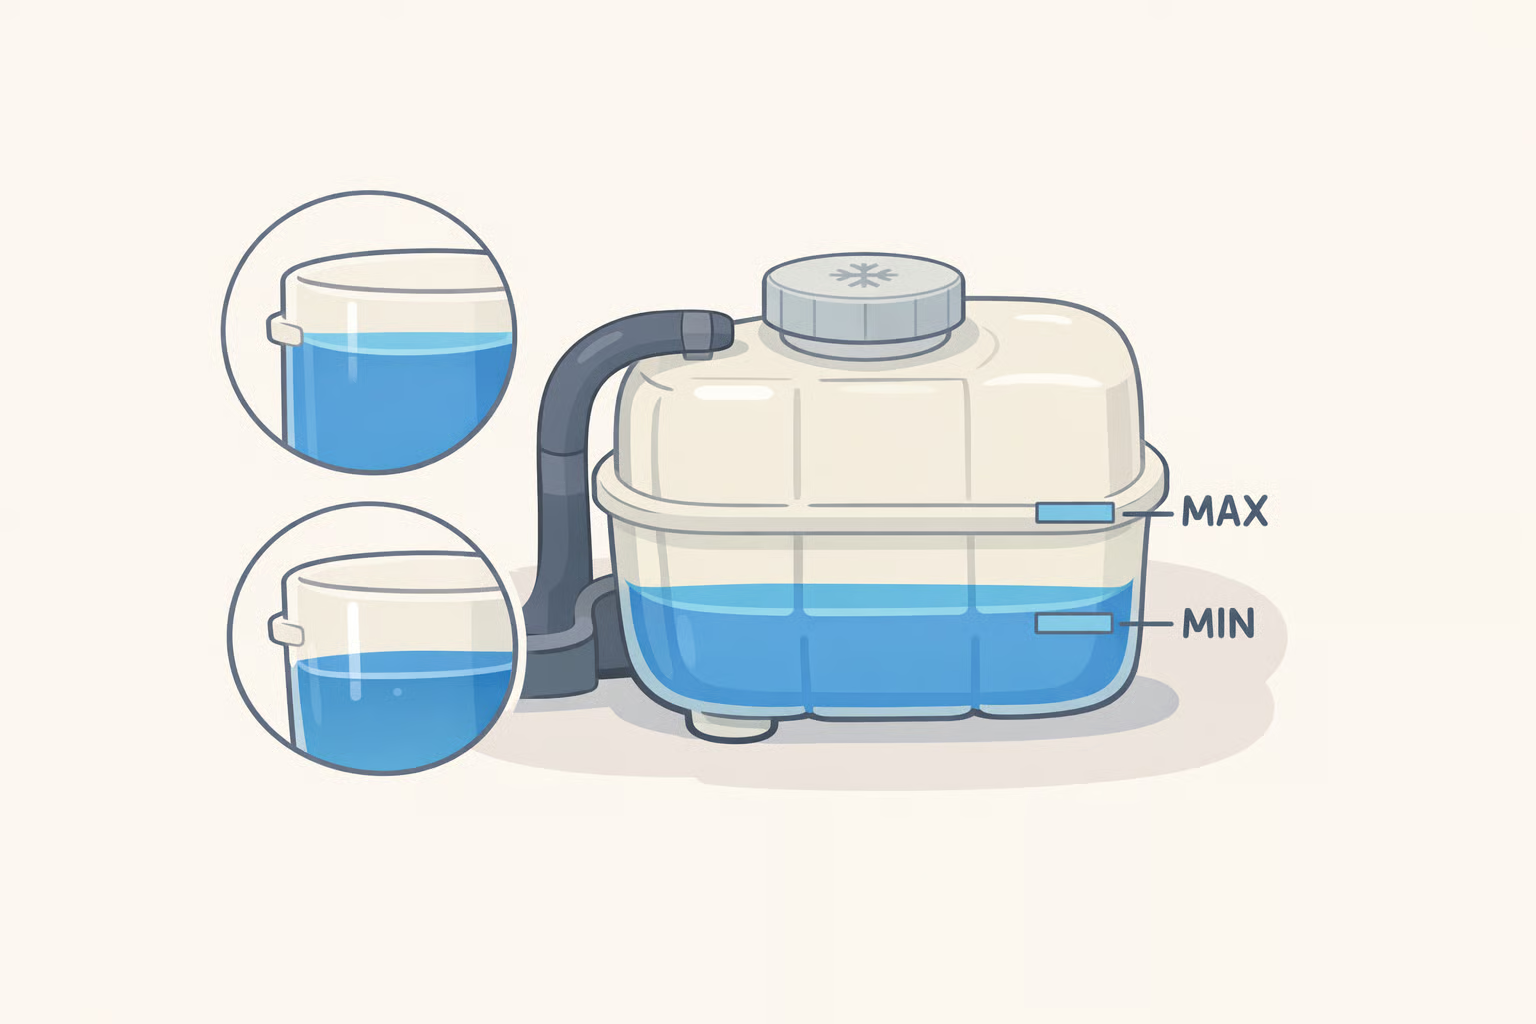
Check coolant level only when the engine is fully cold. Opening a hot radiator cap is dangerous. The overflow reservoir has "min" and "max" markings; fill to max with the type specified in your owner's manual. Coolants vary by vehicle and are not interchangeable (AAA Oregon/Idaho).
After the car sits overnight, confirm there's no fluid pooling beneath it. A coolant flush is generally recommended every 30,000 to 60,000 miles, though manufacturer intervals vary (AAA Oregon/Idaho).
Don't drive until checked if: the temperature gauge climbs above the normal range, the low coolant warning appears, or you see orange, green, or pink fluid under the car.
Task 3: Top off and check all fluids
DIY
Hot temperatures can accelerate the breakdown of engine oil, transmission fluid, and brake fluid. Fluids that tested clean in April can degrade faster once ambient temperatures rise consistently (Locke Auto & Diesel Repair).
Pull the dipstick and check oil level and condition. Dark, gritty oil is overdue for a change. Most engines fall on a 5,000 to 7,500-mile change interval, but the owner's manual governs for your specific vehicle (AAA Oregon/Idaho).
While the hood is open, check transmission fluid, brake fluid, power steering fluid, and windshield washer fluid. Each reservoir has min/max markings. Fluid color matters: cloudy or very dark brake fluid or transmission fluid warrants a shop visit, not just a top-off (NHTSA).
Don't drive until checked if: any fluid shows signs of active leakage beneath the vehicle.
Video of the Day
The systems that most often cause a roadside stop: battery, brakes, and A/C
These get less attention than oil and tires. They're worth the time.
Task 4: Test the battery
DIY check / shop for load test
Car batteries typically last three to five years, and AAA Oregon/Idaho recommends replacing them after five years to avoid an unexpected failure. Heat quietly accelerates internal component deterioration, so a battery that starts fine on a mild morning can fail without warning once temperatures spike (Locke Auto & Diesel Repair).
Starting at the three-year mark, test voltage twice a year. A multimeter works, or any auto parts store can run the test in a few minutes (AAA Oregon/Idaho).
Visually inspect the terminals for white or blue-green corrosion. Clean with a baking soda-and-water solution and confirm the battery is firmly secured in its tray. Vibration from highway travel accelerates wear on a loosely mounted battery (AAA Oregon/Idaho).
If the battery is over five years old, replace it before a major road trip regardless of how it tests. Voltage readings don't capture everything that determines real-world reliability.
Don't drive until checked if: the engine cranks slowly, interior lights dim noticeably during startup, or the battery warning light appears.
Task 5: Inspect the brakes
Shop job
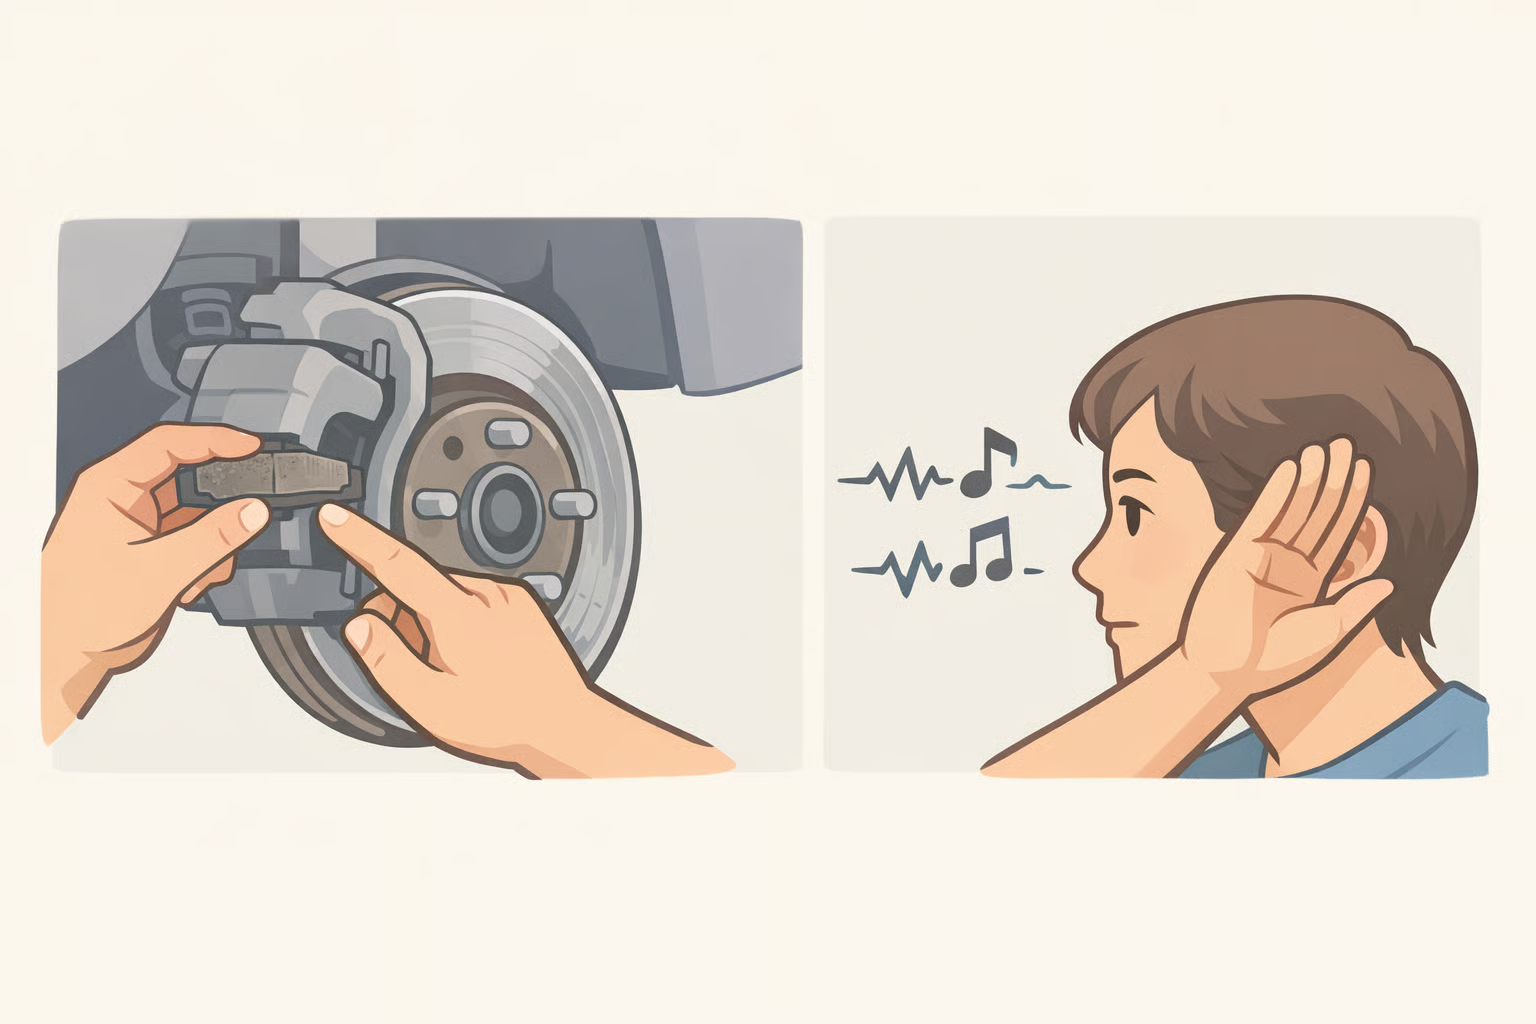
Grinding, squealing, or scraping when stopping are reliable signals that pad material is nearly gone. A soft or slow-responding pedal is a separate problem and requires immediate attention (AAA Oregon/Idaho).
A full inspection covers pads, rotors, linings, and fluid condition. Annual inspection is standard; schedule it before summer travel rather than after. Replacing brake pads runs $100 to $300 per axle on average (AAA Oregon/Idaho).
Don't drive until checked if: any grinding or scraping is present, the pedal travels unusually far before engaging, or the brake warning light is on.
Task 6: Test the A/C and replace the cabin air filter
A/C: shop job for refrigerant / Filter: DIY
Run the A/C for several minutes before the first hot day and confirm it reaches and holds consistently cold air. If the system blows cool but not cold, low refrigerant or component issues may be impairing its ability to cool the cabin effectively (Locke Auto & Diesel Repair; NHTSA).
The cabin air filter, usually located behind the glove box or under the dashboard, blocks pollen, dust, and road debris from reaching the interior. A clogged filter reduces airflow and adds strain to the A/C system. Annual replacement of all air filters, including the cabin filter, is the standard guidance (AAA Oregon/Idaho).
One thing to know: refrigerant handling involves regulated substances. Recharging is a shop task, not a DIY one.
Don't drive until checked if: the A/C produces no cold air at all.
Visibility, rubber, and one final check
Quick tasks. Under an hour total. They matter two hours into a highway drive when something goes wrong.
Task 7: Replace worn wiper blades, fill washer fluid, and check all exterior lights
DIY
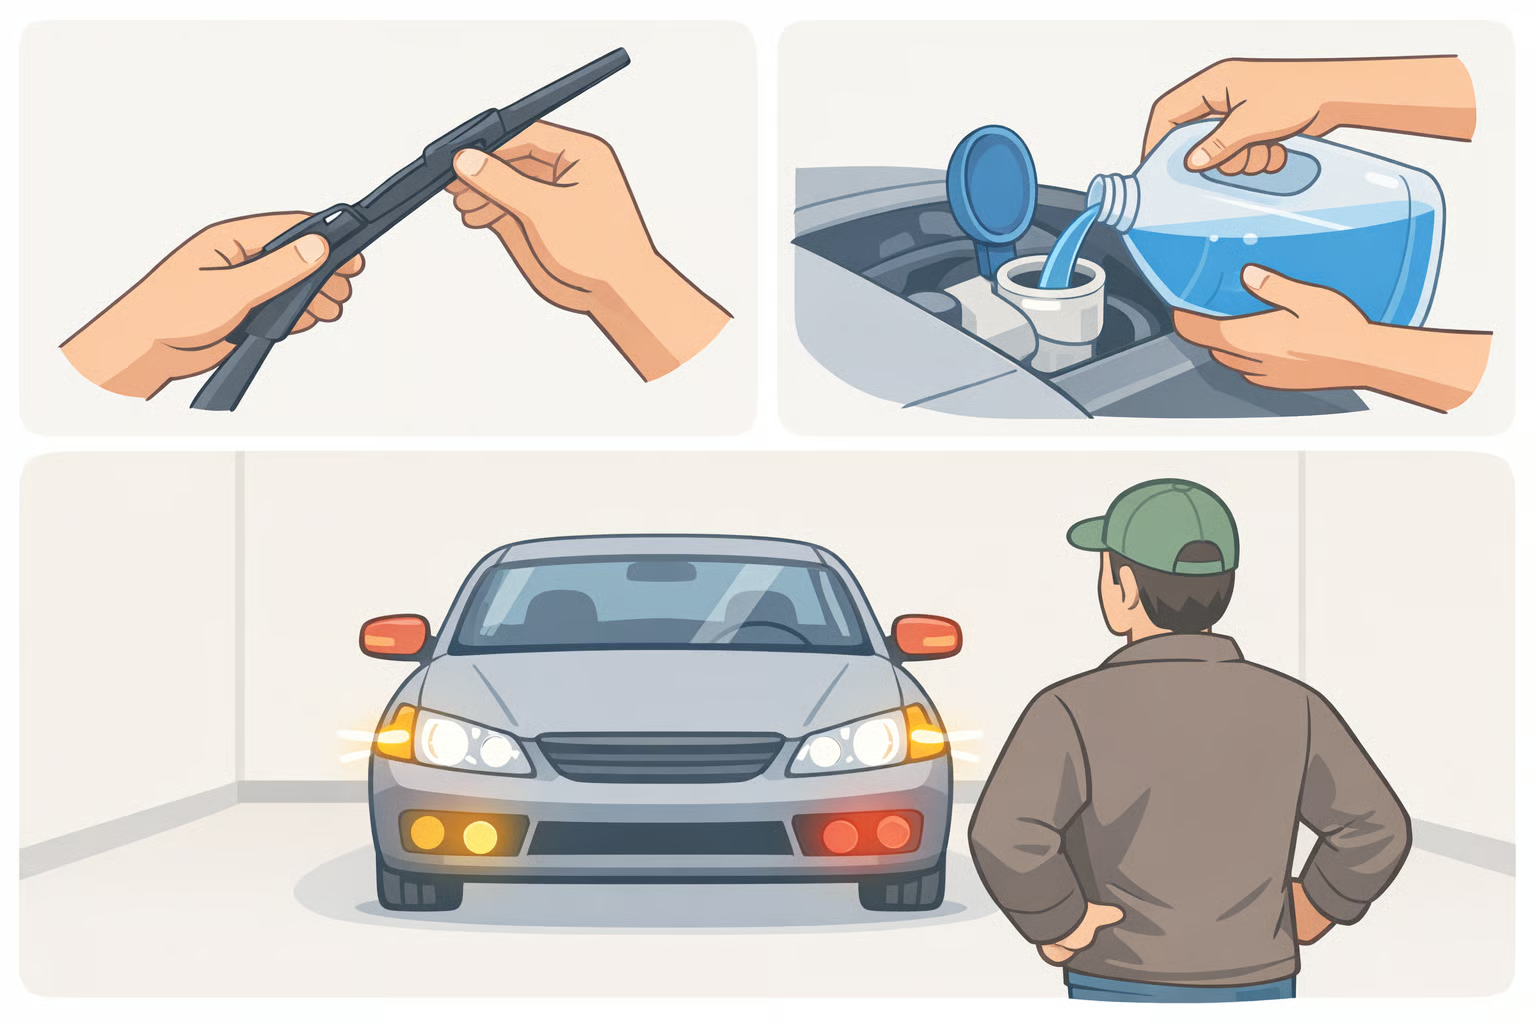
Blades that made it through winter slush and spring rain are often worn by summer. Look for streaking, skipping, or sections that skip across the glass. NHTSA specifically flags the accumulated toll of winter and spring weather as the reason blades frequently need replacement before summer travel.
Blades clip on without tools in most vehicles and are inexpensive. Fill the washer reservoir at the same time and confirm the spray nozzles are aimed at the glass (AAA Oregon/Idaho).
Check all exterior lights: headlights (low and high beam), taillights, brake lights, turn signals, reverse lights, and emergency flashers. Have someone walk the perimeter while you cycle through each one. Several bulbs aren't visible from the driver's seat, and a burned-out brake light is a traffic stop waiting to happen (AAA Oregon/Idaho).
Task 8: Inspect belts and hoses
DIY visual / shop if any wear is found
High summer temperatures accelerate rubber degradation. With the engine cold, inspect every accessible belt and hose under the hood for bulges, blisters, cracks, fraying, or a glazed surface. Any of those signs means replacement now, not continued monitoring (NHTSA).
Check serpentine and V-belts specifically. Also confirm all hose clamps are snug and connections are dry. Any residue around a connection point suggests a slow leak (AAA Oregon/Idaho).
The cost of replacing a worn belt on schedule is a fraction of what a failure costs. Summer heat makes that math worse in a hurry.
Don't drive until checked if: any belt shows visible cracking or fraying, or any hose feels soft, spongy, or shows external moisture.
Before you leave: emergency kit and recall check
Task 9: Pack an emergency roadside kit and run a recall search
DIY
A properly maintained car can still fail. NHTSA recommends carrying a roadside kit regardless of how recently the car was serviced.
Core kit contents per NHTSA and AAA Oregon/Idaho:
- Jumper cables
- Tire jack and pressure gauge
- First aid kit
- Flashlight
- Road flares or reflective triangles
- Phone charger
- Basic tools
- Water, non-perishable food
For summer specifically, extra water is worth adding. If you're stranded in heat, it matters more than most of the other items.
Before any long trip, run the VIN through NHTSA's recall lookup tool at NHTSA.gov/Recalls. Safety recalls are repaired free by dealers, but owners aren't always notified reliably. If an open recall covers a safety-critical system, brakes, steering, or airbags, get it addressed before departure (NHTSA). It takes two minutes.
One non-negotiable safety note: Never leave children unattended in a parked vehicle. A child's body temperature rises three to five times faster than an adult's, and interior temperatures can reach dangerous levels even when outdoor air is only in the low 60s with the windows cracked (NHTSA).
Where to go from here
The tasks above are ordered by consequence. Tires and cooling come first because they're the most heat-sensitive systems; belts, wipers, and the emergency kit follow because they're quick and frequently skipped.
The DIY items, tires, fluids, wipers, lights, and a visual belt check, can be done this weekend. The shop items, brakes, A/C refrigerant, and a battery load test if the battery is older, should be scheduled before the next road trip. The recall search takes two minutes and should happen before both.
Seasonal maintenance done proactively improves fuel efficiency, extends component life, and reduces the chance of a breakdown when temperatures and mileage climb together (Locke Auto & Diesel Repair). None of the tasks above are complicated. The timing is the only thing that makes them effective.