Things You'll Need
1/2-inch acrylic, 4 foot by 8 foot sheet
Measuring tape
Permanent marker
Circular saw
Triple chip carbide tipped blade
Caulking gun
Silicone caulk
Drill
1/2-inch plastic cutting drill bit
1/2-inch countersink
3/8 inch aquarium tubing, 4 feet
Needle
LCD rope light, 15 feet
Aquarium pump
Water

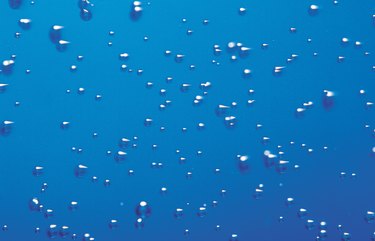
Bubble panels can be used as stress relievers or art pieces. These panels can be built in whatever size fits your design requirements and can be modified with lights to create ambiance for specific situations.
Step 1
Measure, mark and cut two pieces of acrylic that measure 2 feet wide by 2 feet 1/2 inch high. These pieces are the front and back of your bubble panel. Cutting can be done with a mounted circular saw. Use a carbide tipped blade with triple chip teeth. Set the blade height 1/8 inch above the surface. Use a slow, consistent speed during cutting, and use water to cool the blade and prevent the acrylic from melting.
Video of the Day
Step 2
Measure, mark and cut one piece of acrylic that measures 3 inches wide and 2 feet long. This is the bottom of your bubble panel.
Step 3
Measure, mark and cut one piece of acrylic that measures 4 inches wide and 2 feet 1 inch wide. This is the top of your bubble panel.
Step 4
Measure, mark and cut two pieces of that which measure 4 inches wide and 2 feet 1/2 inch high. These are the sides of your bubble panel.
Step 5
Remove the paper backing from all of the cut pieces.
Step 6
Drill a hole in one of the side panels. The hole should be spaced 1 inch from the 4-inch edge and centered at the 2-inch point. Use a 1/2-inch plastic-drilling bit with your drill set at low to medium speed. Allow the drill to make the hole without adding downward pressure. Pour water onto the drill bit and material during drilling to keep the material cool and prevent melting. Replace the drill bit with a 1/2-inch countersink, and pass the countersink through the holes to smooth the edges slightly to avoid stress fractures.
Step 7
Position the bottom of the bubble panel horizontally on a flat surface in front of you. Run a bead of silicone caulking along the left end. Vertically position the side panel with the hole along the caulked area. The side should be centered so there is a 1/2-inch margin on both the front and back of the bottom and the hole should be positioned near the bottom. Ensure the side is positioned in a 90-degree angle to the bottom. Turn the shape on the side and sandwiched between other objects to hold the pieces in place during the drying process. Run beads of caulk around the inside and outside of the joint. Allow the caulk to set.
Step 8
Slide 2 feet of the aquarium tubing into the hole so the tube lies across the entire width of the bottom. Run a bead of silicone along the length of the bottom which is centered along the width. Push the tube down again the silicone to hold it into place. Allow the caulk to dry.
Step 9
Dab silicone caulk into the end of the tube to seal the tube shut. Allow the caulk to dry. Pierce the tube along the length with a needle in the areas where you want bubbles to rise.
Step 10
Run a bead of caulk around the entire diameter of the tubing on the inside and outside of the hole to prevent water leakage.
Step 11
Repeat Step 7 with the remaining side.
Step 12
Run a bead of silicone around the top edges of the shape. Center the front of the bubble panel over the outline and press down to secure the panels together. Run a bead of caulk on the inside and outside of the joint. Allow the caulk to set. Flip the frame over. Repeat this step to secure the back to the bubble panel.
Step 13
Stand the bubble panel up. Center the top on top of the panel, but do not attach it.
Step 14
Run a bead of caulk around the back panel 1/2 inch from the edges. Run the LED rope lights around back and adhere them to the caulk. Allow the caulk to dry. Plug in the LED rope lights.
Step 15
Connect the free end of the aquarium tubing to the air pump. Plug in the air pump.
Step 16
Fill the bubble panel with water.
Tip
The LED lights can be removed completely or attached in different areas of the bubble panel for a different look. Liquid algaecide can be added to the water to prevent algae growth. If growth does occur, the top can be removed and the interior surfaces of the panel can be cleaned.
Video of the Day