Things You'll Need
Dressmaker’s tape measure
Fabric
Pencil or tailor’s chalk
Scissors
Straight edge
Bias tape
Iron
Sewing pins
Sewing machine
Safety pin
Ribbon

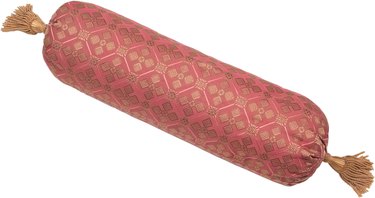
Bolster pillows can be functional neck supports or decorative additions to your bedding ensemble. While the covering might fade, become dirty or fall out of fashion, the stuffing is usually in fine order for many years as long as it stays dry. Making a new bolster cover is a simple sewing project that even a beginner can manage. Purchase 1 yard of fabric unless the bolster is unusually large, and select satin or grosgrain ribbon that is slightly narrower than the folded bias tape.
Step 1
Measure around the pillow to determine its diameter. Measure along one side of the yard of fabric and make a mark 2 inches longer than the bolster diameter measurement. Mark the fabric with a pencil or tailor's chalk and cut it straight across, to make a cutting whose four corners are all 90 degrees, following the grain of the fabric.
Video of the Day
Step 2
Measure the length of the pillow. Measure along the perpendicular edge of the piece of fabric you cut in Step 1 and make a mark 6 inches longer than the length of the pillow. Make your cut straight across.
Step 3
Turn the fabric wrong side up, with the length side facing you and the diameter measurement side running along the left and right sides.
Step 4
Set the bolster on the fabric across the edge closest to you, centered between the left and right edges. Mark the fabric 2 inches wider than the left and right sides of the pillow. Move the pillow to the edge that faces away from you, and repeat the marks.
Step 5
Set a straightedge on the fabric, aligned with the two marks on the left. Trace the edge to make a straight line on the fabric. Repeat at the marks on the right.
Step 6
Cut two pieces of bias tape 2 inches longer than the traced lines on the fabric.
Step 7
Open the tape folds on one end. Turn the end over 1 inch and sew a seam straight across. Repeat at both ends of both tapes. Refold the tape along the original folds.
Step 8
Place one strip of tape along one of the marked lines and pin it down. Repeat with the other strip of tape at the other line.
Step 9
Sew a straight seam along both edges of both strips of tape, forming a casing, and remove the pins. Do not sew across the ends of the tape.
Step 10
Turn the left edge of the fabric over 1 inch and iron it flat at the fold. Repeat at the right side.
Step 11
Fold the left edge of the fabric over again, butting the creased edge against the outermost edge of the left strip of bias tape. Pin the edge. Repeat at the right side. Sew a straight seam along both pinned edges and remove the pins.
Step 12
Fasten a safety pin to one end of a piece of ribbon. Push the pin into a casing opening. Work the pin through the casing and pull it out the opposite end. Leave approximately 6 inches of excess on both ends of the casing, and cut the ribbon. Repeat at the other casing.
Step 13
Arrange the fabric right side up with the casings running along the left and right. Fold the fabric in half widthwise, aligning the two unsewn edges. Sew a straight seam across the edge with a 1-inch seam allowance. Do not sew across the casings. Stop sewing before you reach a casing and begin again on the other side.
Step 14
Turn the tube right side out.
Step 15
Feed the bolster pillow into the tube and center it between the ends. Pull the ribbons and tie them into a bow or a decorative knot.
Tip
Create a no-sew cover by cutting the fabric, wrapping it around the pillow and tying the ends into knots.
Warning
Accidentally overlooked pins can cause injuries.
Video of the Day