Things You'll Need
New T8 ballast
Nut driver set
Screwdrivers
Wire strippers
Touch-type voltage tester
Wire connectors
Electrical tape

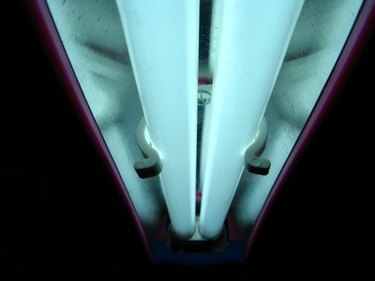
Fluorescent lighting is ideal for a variety of applications and locations, including the garage, basements and other areas where bright, white light is a must. And while the fluorescent tubes last longer than traditional incandescent bulbs, there will come a time when you have to replace them. Simply replacing the fluorescent tube will normally get the light working again; however, if the new tube doesn't light up when installed, it may be that the ballast is faulty. While this may sound bad, it's actually quite easy to wire a T8 ballast and by doing so, you'll be able to avoid replacing the entire fluorescent fixture.
Step 1
Turn off the power to the fluorescent light that has the bad ballast. You can do this either by turning of the light switch or by toggling off the breaker. To avoid accidental injury, turning the circuit off at the breaker is recommended.
Video of the Day
Step 2
Remove the lens cover from the fluorescent light if it has one. If it is a fixture that has no lens, then simply remove the tubes by twisting them until the pins are aligned with the slot on the socket. Once aligned, pull the tube down and out of the sockets.
Step 3
Remove the cover that conceals the T8 ballast. In most cases, the cover can be removed by pinching it and pulling it clear of the holder tabs. Depending on the model of light fixture, you may have to remove two screws in order for the cover to be released.
Step 4
Locate the black and white feed wires that enter into the fixture and hold the touch-type voltage tester against the black wire to ensure that the circuit is indeed off. If the tester beeps, lights up or both (depending on the model), then the circuit is still hot.
Step 5
Remove the wire connectors that connect the black and white wires from the ceiling or wall with the black and white wires on the ballast. Screw the connectors back on the feed wires and bend them out of the way.
Step 6
Look at the ballast that's currently installed and you should see two yellow wires coming out of one end where the black and white wires also exit and two blue and two red wires coming out of the other end. Cut the yellow, blue and red wires with your wire strippers right where they exit the ballast.
Step 7
Find the right nut driver size and loosen one of the two nuts that hold the T8 ballast in place. With one nut loosened, use the nut driver to remove the second nut completely. Be sure you're holding on to the ballast while removing the second nut or it will fall. Once the second nut is removed, slide the ballast out from under the loosened nut and it will come free.
Step 8
Take the new T8 ballast and slide one end under the loose nut, then secure it in place by installing the second nut. When installing the new ballast, make sure that you install it so the like-colored wires are on the same side (yellow wires facing the yellow socket wires, blue and red facing blue and red). Make sure both nuts are tight.
Step 9
Strip about 3/4-inch of insulation from the ends of the yellow, blue and red wires that are attached to the sockets using the wire strippers.
Step 10
Connect one yellow ballast wire with one of the yellow wires from the socket. It doesn't matter which one. Secure it tightly with a wire connector. Do the same thing for the other two yellow wires. Wrap each wire connector with electrical tape.
Step 11
Connect one blue ballast wire with one blue socket wire with a wire connector. Again, it doesn't matter which one. Do the same thing with the second set of blue wires.
Follow this step with the two red wires as well.
Step 12
Connect the white ballast wire with the white wire coming from the ceiling or wall box. Use a wire connector to secure them together and wrap it with electrical tape.
Step 13
Connect the black ballast wire with the black wire coming from the ceiling or wall box. Use a wire connector to secure them together and wrap it with electrical tape.
Step 14
Bend the T8 ballast wires so they are basically in a thin line and not scattered all over the place. Replace the ballast cover, making sure you don't pinch any of the thin ballast wires between the cover and the fixture body.
Step 15
Install the fluorescent tube(s) by inserting the pins straight into the socket and turning the tube until it clicks in place.
Step 16
Replace the lens cover if the fixture has one and turn the circuit back on. Flip the switch and the fluorescent light should turn on.
Tip
In some cases, a buzzing sound emanating from a ballast will identify that it is either bad or going bad.
Warning
Be careful handling bad ballasts as they can get quite hot and leak a sticky tar-like substance. Handle the bad ballast with care especially if someone is near your ladder as ballast are heavy and can injure someone if accidentally dropped. Never throw a ballast in the garbage, they need to be disposed of properly. Call your local municipal for the location of where you can take it.
Video of the Day