Things You'll Need
Molds
Gloves
Cement
Bucket
Water
Liquid latex
Paint Brush
Dust mask
PVC pipes
Razor
Cake pans
Garden trowel

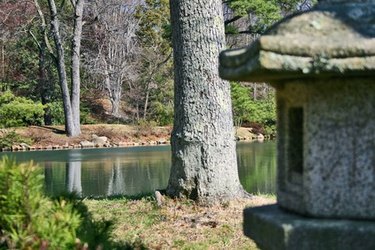
Japanese stone lanterns are a great addition to any landscaping project. The high cost of artisan-made lanterns and the time-consuming difficulty of actually carving a lantern from stone, however, prevent many from thinking seriously about adding a Japanese lantern to their home. Thankfully, creating a Japanese lantern using common household items and store-bought cement is a relatively easy, relatively inexpensive process. With a little know-how and some creativity, you can begin making your own Japanese stone lanterns.
Creating the Mold
Step 1
Collect your materials. A mold can be a number of common household items. For a circular lantern component, you can use a plastic pumpkin Halloween decoration. Cylindrical molds can be built with items such as large, empty yogurt containers.
Video of the Day
Step 2
Cut holes in the sides of your lantern molds with your razor. You'll need to do this in order to create the holes in the lantern through which light will shine.
Step 3
Place PVC pipes through the holes in your container. When you pour the cement into your mold, the PVC pipe will insure that a hollow remains, though which light will shine.
Step 4
As an alternative to steps 2 and 3, collect large plastic containers and smaller, square or circular objects such as empty milk cartons that can be placed inside the larger containers to create hollows.
Making the Parts
Step 1
Put on your work gloves.
Step 2
Coat the inside of your molds and cake pans with liquid latex using the paintbrush. This will prevent the cement from sticking to the material as it dries. Three coats are recommended, at intervals of one hour each. If you are using PVC pipes, coat the outside of them with liquid latex.
Step 3
Mix the cement in the bucket. Store-bought cement will come with mixing instructions. While mixing cement, wear a dust mask to protect your lungs.
Step 4
Pour the wet cement into the mold that has been coated in liquid latex. If you are following Step 4 from section one, place your smaller object inside your larger container and pour the cement around the smaller object.
Step 5
Pour cement into your two cake pans, which will ideally be different sizes. Fill them halfway. Smooth the surface of the cement with your hands or a garden trowel. Allow 12 to 18 hours for the cement to dry.
Assembling the Latern
Step 1
Remove the hardened cement from the molds. The cake pans should easily release hardened cement. The apparatus from Step 4 in Section 1 should as well. For molds like a plastic pumpkin or yogurt container, you may need to cut them away with a razor.
Step 2
Remove the PVC piping from any molds you have used them in.
Step 3
Using the discs from the cake pans as the base, assemble your Japanese lantern. Place the largest disc first, followed by the second largest. Place your central form--the circle, cylinder, square, etc.--on top of the discs, and any smaller shapes or discs you've made on top of this.
Tip
Use one central mold per lantern. Japanese stone lanterns generally consist of a base, central section where the candle will be, and a top. The circular, cylindrical, square, or rectangular sections will be the center of your lantern, and you will only need one of these per project.
Remember to be creative. Your Japanese stone lantern can be anything you want it to be. Use your imagination.
Warning
When working with cement, don’t take your gloves off. It might get hot, and cement might not seem that big a deal when in its wet state, but when it hardens under your fingernails, you’ll rue the day you removed your gloves.
Video of the Day