Things You'll Need
Measuring tape
Circular saw
2-by-4 lumber for frame
1-inch-thick boards or pickets for cladding
Miter box and saw
Sawhorses or workbench
2 1/2-inch galvanized or stainless steel screws
Drill
Screwdriver
Carpenter’s square
Paint or stain
Paintbrush
Level

No wooden fence is complete until you hang a gate to allow access. A wood fence gate can be as simple as a solid rectangular shape attached to gateposts, or it may be an elaborate portal that operates on electronic sensors. Typically, the wood fence gate matches the style of the fence. For example, a picket fence has a gate with pickets identical to those used in the fence. If you have basic carpentry skills, you can build a gate in less than a day.
Step 1
Measure the opening where you plan to hang a gate. If the gate is wider than 4 feet, you should plan on hanging a double gate. Allow 1/2 inch on both sides of the gate, and an extra 1/2 inch if it's a double gate. Plan to leave 1 to 4 inches below the gate. The gate can be as tall as the rest of the fence or wall where you are hanging it.
Video of the Day
Step 2
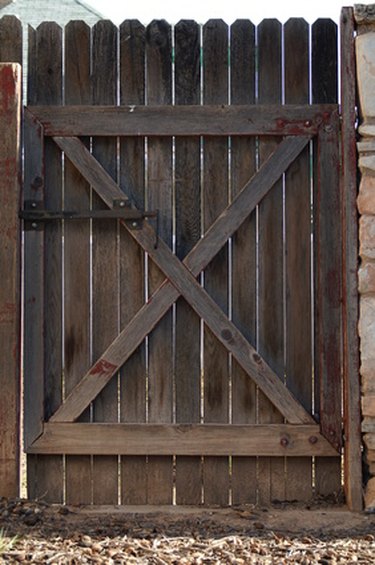
Cut the wood for the gate with a circular saw. You need a rectangular frame cut from 2-by-4 lumber to the dimensions you need. Cut a piece of wood for the diagonal brace. Use a miter box and miter saw to cut the angles on both ends of the brace.
Step 3
Lay the wood pieces out on a workbench or saw horses. Butt the longer, side pieces under the horizontal top piece. Drill at least two pilot holes through each end of the top piece into the upright pieces and attach the two pieces with galvanized or stainless steel screws through the holes. Use a carpenter's square to make sure the top two corners are square. Repeat the process for the bottom of the gate.
Step 4
Set the brace piece in position so the top of the brace is closest to the latch side of the gate. Screw the brace to the side pieces, angling the screws in near the ends of the brace.
Step 5
Cut the pickets or other cladding material. Paint or stain all the wooden pieces at this time. Allow the paint or stain to dry, and apply a second coat.
Step 6
Assemble the pickets or cladding on the gate's frame so that the "pretty" side is facing the outside of the fence. Extend the cladding above and below the frame as needed. Pre-drill holes in the wooden pickets or cladding, and then attach the pieces to the frame. Use at least four screws in each piece of wood.
Step 7
Attach the gate hinges to the inside of the gate with screws. Hold the gate so that it is level and not resting on the ground, and attach the hinges to the gateposts.
Step 8
Position the gate latch where you want it on the gate and attach it with screws. Set the striker plate in position on the gatepost and attach it.
Tip
If the gate is heavy, you may want to add a second diagonal support.
Video of the Day