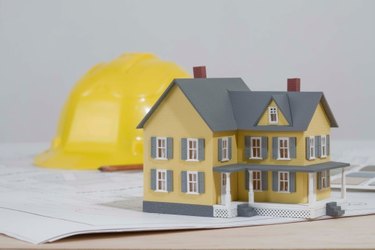
Things You'll Need
Building image
Ruler
Paper
Pencil
Styrene sheets
Balsa panels
Brazilwood sheets
Foam core sheets
Cardstock
Hobby knife
Plastic cement
Craft glue
Paint
Paintbrushes
Matte clearcoat

Modeling in N-scale allows you to create large detailed scale areas in a small amount of space. For model railroaders or diorama makers this can be extremely useful as it presents the opportunity to build epically, including everything from single buildings to small towns in your model. While there are a large variety of buildings ready for use in N-scale, getting the look just right may require you to forgo the ready-made choices and build your own from scratch. Working from scratch, you can create any building imaginable, from an ancient manor house to an imposing skyscraper. With scratch building you remove all limitations, leaving your scaled areas open for whatever look you're trying to achieve.
Step 1
Locate an image of the building you wish to recreate to scale. You can find images of structures in online photo repositories such as Flickr, or Wikimedia Commons, or architectural magazines.
Video of the Day
Step 2
Draw two scaled drawings of the building onto a piece of paper. Use a conversion rate of 1 scale inch for every 13 feet, 4 inches of actual building size. Draw each external building surface, using a straightedge where necessary for guidance. Draw only the shapes of each surface for the first drawing. This is what you'll use as a template for creating the basic structure. Fill in as many details as possible into the second drawing. Include labels as to the materials used to create the building with the second drawing for later recreation on scale.
Step 3
Gather the materials you intend to use for the building. You can purchase building supplies made of styrene that mimic common building materials such as brick, concrete and clapboard in scale, from a hobby shop that sales model railroading supplies. Other commonly used scratch building materials are balsa and brazilwood sheets, foam core sheets and cardstock. You can shape these items however you like to create the different elements of your building from walls to rooftop. You can also purchase harder materials to recreate detail pieces such as windows, decorative posts and awnings from the same railroad hobby shops.
Step 4
Use your scale drawings as a template for cutting the body of the building. Transfer the measurements over to the building material sheets with a pencil, or cut the shape from your drawing and place over the sheet to outline it onto the sheet. Cut the shape from the sheet with a hobby knife. Sand the edges of styrene with a fine-grit sandpaper to clean any jagged edges from the cutting process.
Step 5
Glue the building pieces together using plastic cement for styrene and white craft glue for other building materials. Hold the pieces together for about a minute before setting them down to dry. Allow the glue to dry completely before continuing.
Step 6
Add details to your building to make it more realistic. Cut pieces of the building materials to create the detail elements, or glue on purchased details. The more detail you add the more realism for the scale model building, but the smaller the building the less realism needed to convey the building image. Use more details for larger models such as large multi-storied homes and office buildings than with small railroad shacks. You can create material elements such as bricks or clapboard by scoring the surface of your material lightly with the hobby knife to emulate the look of the building material. Wait for the added detail elements to dry.
Step 7
Paint the model with acrylic paints to match the look of the real building. Apply a base coat of white paint as a primer to help your top coat adhere to the model. Allow the base coat to dry two hours and then apply the top coat of paint. Use a variety of brush sizes to get the best detail into your model. Wait overnight for your top coat to dry and weather the model to make it appear as though it has been exposed to the elements.
Step 8
Dilute a brown paint with one part paint to five parts water. Dip your brush into the diluted mixture and wipe it nearly dry on a paper towel. Lightly go over the surface of the model, drywashing it with the brown diluted paint to give it a weathered look. Apply a second drywash layer for older dustier appearing buildings. Allow the paint to dry for two hours.
Step 9
Apply a layer of matte clearcoat to the model with a paintbrush to protect the paint colors. Allow the clearcoat and the rest of the paint on the model to dry completely for 24 hours before use.
Warning
Apply glue and paint in a ventilated area to avoid breathing in the fumes.
Video of the Day