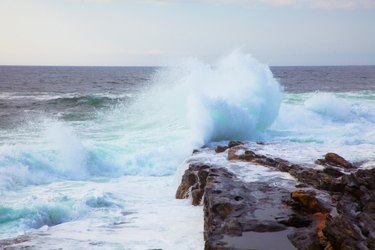
The ocean is an awe-inspiring sight with a seemingly endless expanse of rolling water that stretches to the horizon. The ocean can be calm and relaxing, fun and playful, romantic and mysterious, or fierce and powerful. The details of the water -- the constant movement of the ocean and the rhythm of the waves -- can be hard to capture on canvas. A subtle detail like the white foam of a rolling breaker or the spray of a cresting wave, however, can easily add movement and realism to your painting that might otherwise be lacking.
Step 1
Locate a suitable reference to work from. Sea foam is a rapidly changing and dynamic subject that might be very hard to create convincingly from memory alone. Find multiple photographs of breaking waves that you can refer to. You do not have to copy the details exactly, but you want to observe the way the foam interacts with the waves. If you are painting from real life, study waves at each point in the life cycle. Waves break the same almost every time; the only thing that changes is the scale of the wave.
Video of the Day
Step 2
Paint the seascape and the waves. Work your way from the underlying basic colors to the more specific hues of the water. The ocean is not a single color, so use a mixture of different hues and shades to create a convincing seascape.
Step 3
Form contours of waves with long smooth brush strokes. Follow the path of the water with your brush. The texture of the paint will help create the illusion of shape and movement. Taller waves will have slightly darker water at the base of the wave, while the top will have more light shining through, creating a lighter hue or even a slight glow.
Step 4
Add the sea foam with a small brush and short quick brush strokes. You can also use a sponge and gently dab to create foam. Use white paint with just a hint of the primary hue of the sky in it. The ocean in real life reflects the color of the sky and the sea foam often will have a hint of this as well. Avoid creating solid blocks of a single color and let flecks of the water peek through, giving the illusion of spray and foam.
Step 5
Create depth and detail to the foam by adding shadow and shade. When sea foam rolls into a beach or tops a breaking wave, it's a three-dimensional object. The underside of the foam will often be slightly darker than the foam on top. This is easier to see if you are using a photograph as your source. With a small brush, apply a slightly darker hue to the underside of rolling foam or anywhere the light may not be able to reach as well. Blend the transition from dark to light smoothly for a nice, rounded edge.
Video of the Day