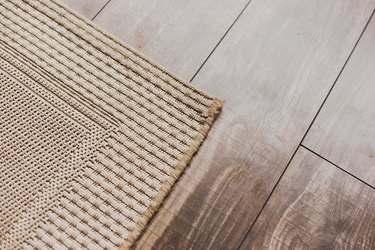
Rug binding means finishing the edges to secure them, preventing unraveling and giving the rug an attractive look. It is typically done in a factory or workshop using specialty equipment. Fortunately for anyone interested in DIY rug binding, the option of using self-adhesive carpet binding tape is a great alternative. It's inexpensive, fairly straightforward to apply and allows for completely custom rugs. You can use DIY rug binding techniques to transform a bargain carpet remnant into a rug of any size or shape, to trim an existing rug to a different size or shape or to give new life to a rug with damaged edges.
Things You'll Need
Painter's tape
Metal straightedge
Large sheet of cardboard
Carpet cutter, utility knife or tailoring shears
Self-adhesive carpet binding tape
Scissors
Hot glue gun and glue sticks
Video of the Day
How to Bind Rugs Without Sewing
Step 1
With painter's tape and a metal straightedge, mark the edges of the carpet remnant or rug to match your desired finished size and shape. You can do this on the upper side or underside of the rug depending on which is easier for you. Be sure to center any design motifs on a patterned rug. If you are cutting a damaged rug, mark the edges so that you will trim away any frayed fibers.
Video of the Day
Step 2
Place a large sheet of cardboard underneath the rug and cut along the marked tape lines with a carpet cutter, utility knife or tailoring shears. Try to make neat, straight cuts. Remove the painter's tape and turn the rug right side up if necessary.
Step 3
Unravel an arm's length of self-adhesive carpet binding tape. With scissors or shears, cut a neat, straight new edge as the starting edge.
Step 4
Peel back several inches of the protective tape from the carpet binding tape's adhesive strip. Starting in the center of one side of the rug (not at the corner) slide the adhesive strip under the rug so that the corded edge of the binding tape is flush with the cut edge of the rug.
Step 5
Press down along the edge of the rug to help it stick firmly to the adhesive, making sure the binding tape is straight and pressed up closely against the edge of the rug.
Step 6
Pull another few inches or so of the protective tape off the adhesive strip and continue positioning and pressing the rug edge down on the adhesive. At this stage, the adhesive isn't fully bonded, so you can reposition the binding tape if necessary. Make sure it's straight and neat before continuing.
Step 7
When you reach the first corner, allow the binding tape to extend in a straight line past the corner. Use scissors to snip into the adhesive strip flush with the second side edge of the rug up to but not through the cording.
Step 8
Pivot the binding tape 90 degrees so that it's now aligned with the second side edge of the rug. The adhesive strips will overlap underneath the rug. Press down on the corner to secure the overlapped section of the adhesive strip. Alternatively, trim the strip to create a neat 45-degree join. This is the trickiest part of DIY rug binding.
Step 9
Continue attaching the carpet binding in the same manner until you reach your starting point again.
Step 10
Carefully trim the carpet binding with scissors so that the two ends will align together exactly with no gap or overlap.
Step 11
Apply a bead of hot glue to the cording part of each cut edge of the carpet binding. Press the ends of the cording together and hold them in place for about 30 seconds.
Step 12
Use the hot glue gun on the carpet binding all around the edges of the rug. Press the tip of the hot glue gun between the carpet binding and the edge of the rug, squeezing a small bead of glue in the space.
Step 13
Working a few inches at a time, apply the hot glue and press the cording firmly into the edge of the rug. Hold the cording in place for a few seconds before moving on to the next section.
Step 14
Use the hot glue gun on the carpet binding all the way around the perimeter of the rug. Allow the glue to dry completely before moving or stepping on the rug.