Things You'll Need
Crowbar
Hammer
Electric saw
2-by-4 or other appropriate lumber
Electric drill
Wood screws
Measuring tape
Rigid insulation sheets
Drywall
Drywall saw
Drywall screws
Drywall tape
Drywall compound
Plastic drywall knife
Drywall sanding sheets
Primer
Paint
Paintbrushes or rollers
Painter's tape (optional)

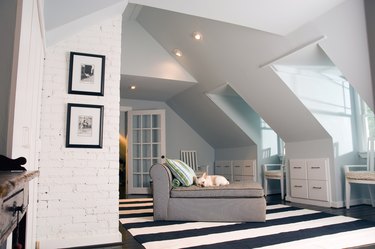
When converting a low ceiling to a vaulted or cathedral ceiling, the general idea is to open up the room, creating more air and light and generally improving the overall look of the home. However, this project is a significant remodel. You should approach it with a great deal of care and consult a residential structural engineer or contractor with experience in this area.
Demolishing the Low Ceiling
Step 1
Demolish the existing drywall in the ceiling with a hammer. Sweep up the mess later. Pry any remaining drywall or other material off the ceiling with a crowbar.
Video of the Day
Step 2
Consult with a professional about which cross supports you can safely remove with an electric saw. Do not remove any other supports or you'll risk your roof sagging or even caving in.
Step 3
Brace the roof using an alternative method for cross supports. An engineer or contractor will suggest the appropriate method but usually involves constructing new rafters. Typically, you would use 2-by-4 beams and wood screws, but a professional may suggest larger pieces of wood depending on the structure of the roof. Carefully measure each new rafter before cutting to size.
Step 4
Use an electric drill to install the rafters along the underside of the roof. They must be secured to the existing structure to ensure stability. Ask a qualified contractor or engineer to inspect the bracing before you continue.
Step 5
Remove any remaining supports or rafters that will be in the way while constructing vaulted ceiling. As a general rule, only remove the minimum required original supports. Leave other supports to give added stability to the finished ceiling.
Installing the Vaulted Ceiling
Step 1
Install any skylights now since it will be more difficult to install these later. Though they are not difficult to install, consult a professional to determine skylight placement and to be certain they will not interfere with the structural integrity of the roof.
Step 2
Install rigid insulation sheets according to the manufacturer's instructions. This product will insulate your roof and help provide added structural support.
Step 3
Measure and cut drywall to the appropriate sizes. Secure these in place with drywall screws. You must have someone help you hold the drywall in place to avoid injury, so recruit a friend or qualified professional to assist you.
Step 4
Tape all drywall joints with drywall tape. Using the drywall knife and compound, cover this tape, feathering the edges of the compound to better blend it into the drywall. Let dry completely. Sand smooth. Repeat this process once more to obtain a smooth and professional look.
Step 5
Prime the surface of the vaulted ceiling to seal the drywall. Use a high quality paintbrush, roller, or paint sprayer to avoid unsightly streaks. Allow primer to dry.
Step 6
Paint the vaulted ceiling your chosen color. If necessary, use your painter's tape to prevent you from getting paint on moldings and other areas.
Tip
If you intend to paint the ceiling a darker color, use a tinted primer. Lighter colors should be used with a white primer. Add moldings around the ceiling to enhance the beauty of your work.
Warning
Installing a vaulted ceiling can be challenging and dangerous. Consult a qualified professional before beginning demolition.
In most areas, you must have a permit to convert a flat ceiling to a vaulted ceiling. You will usually need an engineer's stamp on your blueprints to obtain this permit.
Video of the Day